JeepParts
My Garage
My Account
Cart
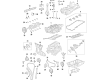
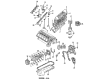
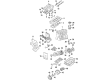
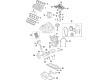
OEM Jeep Valve Stem Seal
Engine Valve Seal- Select Vehicle by Model
- Select Vehicle by VIN
Select Vehicle by Model
orMake
Model
Year
Select Vehicle by VIN
For the most accurate results, select vehicle by your VIN (Vehicle Identification Number).
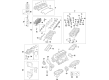
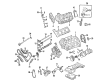
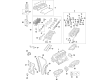
27 Valve Stem Seals found


Jeep Valve Seals Part Number: 5048348AA
$4.09 MSRP: $6.20You Save: $2.11 (35%)Ships in 1-2 Business DaysProduct Specifications- Other Name: Seal - Valve Guide; Valve Stem Seal; Seal Valve Guide Exhaust


Jeep Valve Seals Part Number: 2222425000
$8.74 MSRP: $13.10You Save: $4.36 (34%)Product Specifications- Other Name: Seal - Valve Guide; Valve Stem Seal; Seal Valve Guide


Jeep Valve Seals, Black/Brown Part Number: 5048025AA
$3.35 MSRP: $4.95You Save: $1.60 (33%)Product Specifications- Other Name: Seal - Valve Guide; Valve Stem Seal; Seal Valve Guide Black and Brown are interchangeable; use all one color on the cylinder head.


Jeep Valve Seals Part Number: 53009886
$6.02 MSRP: $8.95You Save: $2.93 (33%)Ships in 1-2 Business DaysProduct Specifications- Other Name: Seal - Valve Guide; Valve Stem Seal; Exhaust & Intake Valve Seals; Standard Intake Valve Stem Seal; Valve Guide Seal.
- Replaces: 33002729


Jeep Valve Seals Part Number: 5047453AA
$6.19 MSRP: $9.20You Save: $3.01 (33%)Ships in 1-2 Business DaysProduct Specifications- Other Name: Seal - Valve Guide; Valve Stem Seal; Seal Valve Guide


Jeep Valve Seals Part Number: 5066775AA
$6.53 MSRP: $9.70You Save: $3.17 (33%)Ships in 1-2 Business DaysProduct Specifications- Other Name: Seal - Valve Guide; Valve Stem Seal; Valve Guide; Seal Valve Guide


Jeep Valve Seals Part Number: 5037798AA
$12.83 MSRP: $18.95You Save: $6.12 (33%)Ships in 1-2 Business DaysProduct Specifications- Other Name: Seal - Valve Guide; Valve Stem Seal; Seal Valve Guide


Jeep Valve Seals Part Number: 4892674AB
$8.44 MSRP: $12.35You Save: $3.91 (32%)Ships in 1-2 Business DaysProduct Specifications- Other Name: Seal - Valve Guide; Seal Valve Guide
- Replaces: 4892674AA, 68337513AA


Jeep Valve Seals Part Number: 53009887
$10.79 MSRP: $15.65You Save: $4.86 (32%)Ships in 1-2 Business DaysProduct Specifications- Other Name: Seal - Valve Guide; Valve Stem Seal; Stem Seal; Exhaust Valve Seals; Seal, Exhaust Valve Stem, Standard; Seal, Exhaust Valve; Seal Valve Guide
- Replaces: 33002522


Jeep Valve Seals Part Number: 53021578AA
$10.96 MSRP: $15.90You Save: $4.94 (32%)Ships in 1-3 Business DaysProduct Specifications- Other Name: Seal - Valve Guide; Valve Stem Seal; Seal Valve Guide


Jeep Valve Seals Part Number: 53021974AA
$8.12 MSRP: $11.70You Save: $3.58 (31%)Ships in 1-2 Business DaysProduct Specifications- Other Name: Seal - Valve Guide; Valve Stem Seal; Seal Valve Guide
- Replaces: 53020752AD


Jeep Valve Seals, Black/Brown Part Number: 5184168AB
$9.28 MSRP: $13.35You Save: $4.07 (31%)Ships in 1-2 Business DaysProduct Specifications- Other Name: Seal - Valve Guide; Valve Stem Seal; Seal Valve Guide Black and Brown are interchangeable; use all one color on the cylinder head.


Jeep Valve Seals Part Number: 53022090AB
$11.60 MSRP: $16.70You Save: $5.10 (31%)Ships in 1-2 Business DaysProduct Specifications- Other Name: Seal - Valve Guide; Valve Stem Seal; Seal Valve Guide Not Included; Quantity Is Per Cylinder Head.


Jeep Valve Seals Part Number: 4648619
$6.34 MSRP: $8.03You Save: $1.69 (22%)Ships in 1-2 Business DaysProduct Specifications- Other Name: Seal - Valve Guide; Seal, Valve Stem Standard-0.15Mm Outside; Valve Guide .015" Oversize; Valve Guide/Spring.


Jeep Valve Seals Part Number: 4893586AA
$4.82 MSRP: $7.35You Save: $2.53 (35%)Ships in 1-2 Business DaysProduct Specifications- Other Name: Seal - Valve Guide; Valve Stem Seal; Seal Valve Guide Intake

Jeep Valve Seals Part Number: 5175438AA
$13.62 MSRP: $30.35You Save: $16.73 (56%)Ships in 1-2 Business DaysProduct Specifications- Other Name: Seal - Valve Guide; Valve Stem Seal; Seal Valve Guide


Jeep Valve Seals Part Number: 68295813AA
$4.47 MSRP: $6.50You Save: $2.03 (32%)Ships in 1-2 Business DaysProduct Specifications- Other Name: Seal - Valve Guide; Valve Stem Seal; Seal Valve Guide

Jeep Valve Seals Part Number: 5093891AA
$4.82 MSRP: $7.10You Save: $2.28 (33%)Ships in 1-2 Business DaysProduct Specifications- Other Name: Seal - Valve Spring; Valve Stem Seal; Retainer Valve Spring Lower; Retainer Valve Spring Upper; Retainer Valve Spring; Seal Valve Guide

Jeep Valve Spring Retainers Part Number: 68440259AA
$5.47 MSRP: $8.15You Save: $2.68 (33%)Product Specifications- Other Name: Retainer - Valve Spring; Retainer Valve Spring

Jeep Hardware Kit Part Number: 68416505AA
$39.88 MSRP: $59.35You Save: $19.47 (33%)Product Specifications- Other Name: Sensor; Valve Stem Kit includes 4 grommets, 4 seats, 4 washers, tool, and instruction sheet.
| Page 1 of 2 |Next >
1-20 of 27 Results
Jeep Valve Stem Seal
OEM parts sourced directly from Jeep deliver superior quality, long lasting strength, and a precise fit you can trust. Each item goes through strict quality checks to ensure safety, toughness, and performance that matches your factory equipment. At JeepPartsDeal online shop, you'll get top-quality, budget-friendly OEM Jeep Valve Stem Seal for your vehicle. We focus on giving you a high standard without pushing up the price. Our full selection of genuine factory products comes backed by the original manufacturer's warranty. You'll love our fast delivery, seamless shopping experience, and convenient return policy, saving you all the hassle.
Jeep Valve Stem Seal prevents the flooding of cylinders with oil that would flex power saving every drop. Jeep created its myth of war heroism and preserved it in the mountain passes and sands. Since their first civilian CJ, the company has challenged the glitzy showroom antics with simple capability, open-air cabins, robust frames and the old seven-slot grille. Jeep Selec-Terrain allows the driver to turn a knob and instantly adjust traction to snow, mud, or sand and the modern software will include voice recognition, wireless updates, and other driver-helpful features so the journey will not even stop due to the technical migraine. Community goes beyond superficial displays of loyalty like owners waving at the road, sharing trail tips via the internet, wrenching over the weekend as a response because the brand seems a tribe more than a badge. Valve Stem Seal also wraps all the valve shafts to ensure that oil does not enter the combustion chamber, eliminates blue smoke, and maintains compression integrity even when engines struggle during long highway pulls or rough passages. Valve Stem Seal also cuts oil usage, which is cost efficient and minimizes the carbon grime that may contaminate the spark plugs. Valve Stem Seal is made of heat-tough rubber and fine metal cores that defy scorching exhaust gas and hard winter starts, as well as the incessant strike of high rpm. Fit a new Valve Stem Seal and the engine will run smoother, longer and meet the promise of any Jeep without having to fill up every half-minute.
Jeep Valve Stem Seal Parts and Q&A
- Q: How to replace valve stem seals in 2.5L four cylinder engine on Jeep Wrangler?A:Starting with the cylinder which is housing the defective part remove the valve cover and the spark plug; if valve stem seals are all being replaced, all spark plugs should be removed. Thread the crankshaft until the piston of the cylinder to be worked for the purpose reaches the top dead position on the compression stroke if all the valve stem seals of the engine are to be changed, beginning from cylinder no 1 in case of progressing in firing order. Insert an adapter into the hole of spark plug and attach an air hose to a container with compressed air; usually one can find this at auto part shops. Screw out the rocker arm and pivot for the valve with the damaged component, pull out the pushrod and use compressed air to hold the valves since their gaps are filled with air. In case the valve faces or seats get worn or damaged the application of air-pressure to retain the valves may not work. If compressed air is not available, place the piston just prior to TDC on the compression stroke, insert a long piece of nylon rope through the spark plug hole and with the business end submerged in the fuel, crank the engine until there is mild resistance felt. Push shop rags into the cylinder head holes so that parts do not fall in the engine, use a valve spring compressor or an ordinary screw driver to compress the spring and then remove the keepers by twisting them with the small pliers or a magnet. If the pressure of the air does not close the valve then the face or the seat of the valve is likely to be worn and this could only be rectified by removing the cylinder head. Twist around a rubber band or some tape round the top of the stem so that it does not fall into the combustion chamber, then deflate the pressure gauge and have a look at the stem for damage, especially, if it is bent it will show eccentricity. Check that the valve floats freely in the guide ; if the valve gets stuck the valve or guide must be refitted and the head has to be removed. Just apply some normal pressure to operate the valve to close and then remove the tape or rubber band. coat the valve stem with the engine oil/fit a new guide seal then the spring and the shield over the valve. Place the valve spring retainer down on the valve stem, compress the spring and capture the keepers into the groove put a little grease on the keepers to hold them in place. Take weight off the spring tool and check that the keepers are seated, finally shut off the air hose and withdraw the spark plug hole adapter and the rope if used. Last, the rocker arms and pushrods, spark plugs and wires must be remounted, the valve cover replaced, the engine started, and if the car produces oil leak and other sounds originating in the valve cover area.

Related Jeep Parts
 Jeep Oil Filter
 Jeep Engine Mount
 Jeep Oil Pan
 Jeep Oil Pump
 Jeep Timing Chain Tensioner
 Jeep Timing Cover
 Jeep Balance Shaft Chain
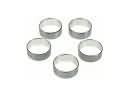 Jeep Camshaft Bearing
 Jeep Crankshaft Timing Gear
 Jeep Intake Valve
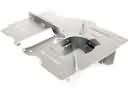 Jeep Oil Pan Baffle
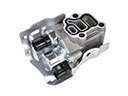 Jeep Spool Valve