JeepParts
My Garage
My Account
Cart
OEM 2006 Dodge Durango A/C Clutch
Air Conditioning Clutch- Select Vehicle by Model
- Select Vehicle by VIN
Select Vehicle by Model
orMake
Model
Year
Select Vehicle by VIN
For the most accurate results, select vehicle by your VIN (Vehicle Identification Number).
4 A/C Clutches found


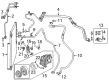
2006 Dodge Durango Clutch Coil Part Number: 5003681AA
$185.30 MSRP: $279.00You Save: $93.70 (34%)Ships in 1-2 Business DaysProduct Specifications- Other Name: Coil - A/C Clutch; A/C Compressor Clutch Coil; Clutch; Coil; Coil A/C Clutch; A/C Compressor Clutch
- Replaces: 5072863AA
- Item Weight: 2.10 Pounds
- Item Dimensions: 5.1 x 4.7 x 2.3 inches
- Condition: New
- Fitment Type: Direct Replacement
- SKU: 5003681AA
- Warranty: This genuine part is guaranteed by Mopar's factory warranty.

2006 Dodge Durango Pulley Assembly Part Number: 5135993AA
$184.18 MSRP: $233.48You Save: $49.30 (22%)Ships in 1-2 Business DaysProduct Specifications- Other Name: Pulley Kit - A/C Compressor; A/C Compressor Clutch Pulley; Serpentine Belt Drive Kit; Clutch; Pulley Hub Kit A/C Compressor; A/C Compressor Clutch
- Item Weight: 4.90 Pounds
- Condition: New
- Fitment Type: Direct Replacement
- SKU: 5135993AA
- Warranty: This genuine part is guaranteed by Mopar's factory warranty.

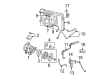
2006 Dodge Durango Clutch Coil Hardware Kit Part Number: 5135972AA
Product Specifications- Other Name: Clutch Package - A/C Compressor; A/C Compressor Clutch; Clutch Overhaul Kit A/C Compressor: Includes Snap Rings, Shims, Pulley Bolt, Bracket, Screw.
- Item Weight: 1.20 Pounds
- Item Dimensions: 2.9 x 2.6 x 0.6 inches
- Condition: New
- Fitment Type: Direct Replacement
- SKU: 5135972AA
- Warranty: This genuine part is guaranteed by Mopar's factory warranty.
2006 Dodge Durango Pulley Assembly Part Number: 5135971AA
Product Specifications- Other Name: Pulley Kit - A/C Compressor; A/C Compressor Clutch Pulley; Serpentine Belt Drive Kit; Clutch; Pulley Hub Kit A/C Compressor; A/C Compressor Clutch
- Item Weight: 4.60 Pounds
- Condition: New
- Fitment Type: Direct Replacement
- SKU: 5135971AA
- Warranty: This genuine part is guaranteed by Mopar's factory warranty.
2006 Dodge Durango A/C Clutch Parts and Q&A
- Q: How to Maintain the A/C Clutch on 2006 Dodge Durango?A: You should start by disconnecting and isolating the negative battery cable and then removing the accessory drive belt. Cut the engine wire harness from the threaded terminal that is on top of the A/C compressor. Take out the bolts that connect the A/C compressor to the engine and suspend it. Remove the field coil connector and its wire lead from the connector bracket with great care. With a band-type or strap wrench, remove the shaft bolt, as this holds the clutch plate still. Make sure to keep space between the clutch plate and the pulley to not damage them. Make sure you do not drop or lose any clutch shim(s) during disassembly. Gently pound the clutch plate with a plastic mallet, working it loose from the splines along the compressor shaft and pull out the clutch plate and shim(s). Use snap ring pliers to take out the snap ring linking the pulley and bearing assembly to the front of the compressor and then remove both the bearing and pulley. Then, take out the snap ring holding the compressor clutch field coil onto the front of the A/C compressor and pull out the field coil. To install, line up the dowel pin of the compressor clutch field coil with the front hole of the A/C compressor and put the field coil in place, taking care the wire lead stays free. Replace the snap ring around the compressor clutch field coil with a new one to ensure it fits in place. Set the pulley and bearing into place at the front of the A/C compressor, tapping it gently if needed and connect it with a new snap ring. Should you choose to use the original clutch plate and pulley and bearing assembly, attach the original shim(s) back onto the compressor shaft; if using replacements, fit 2.54 mm thick shim(s) on the shaft in a stack. Attach the clutch plate to the compressor's front end and tighten the compressor shaft bolt until you achieve a torque of 19 N.m. After tightening, test the air gap in several places to confirm it measures 0.35 mm to 0.60 mm and use shims as needed to get it right. Route the compressor clutch field coil wire lead behind the connector bracket and attach the connector onto the bracket. Sit the new A/C compressor onto the engine, replace the bolts to secure it, link the harness on the engine to the compressor clutch field coil connector, belt the compressor to the engine and reconnect the negative battery cable.
Related 2006 Dodge Durango Parts
 2006 Dodge Durango Blower Motor
 2006 Dodge Durango Blend Door Actuator
 2006 Dodge Durango Heater Core
 2006 Dodge Durango Blower Motor Resistor
 2006 Dodge Durango Evaporator
 2006 Dodge Durango A/C Accumulator
 2006 Dodge Durango A/C Compressor
 2006 Dodge Durango A/C Expansion Valve
 2006 Dodge Durango A/C Hose
 2006 Dodge Durango A/C Service Cap
 2006 Dodge Durango A/C Switch
 2006 Dodge Durango Blower Control Switches