JeepParts
My Garage
My Account
Cart
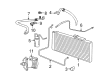
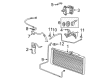
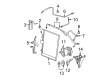
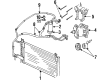
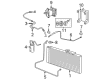
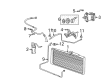
OEM Dodge Ram 2500 A/C Hose
Air Conditioning Hose- Select Vehicle by Model
- Select Vehicle by VIN
Select Vehicle by Model
orMake
Model
Year
Select Vehicle by VIN
For the most accurate results, select vehicle by your VIN (Vehicle Identification Number).
42 A/C Hoses found


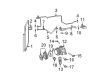
Dodge Ram 2500 Liquid Line Part Number: 55056918AD
$108.04 MSRP: $164.00You Save: $55.96 (35%)


Dodge Ram 2500 Discharge Line Part Number: 55056914AE
$113.73 MSRP: $173.00You Save: $59.27 (35%)


Dodge Ram 2500 A/C Line Part Number: 55056922AB
$122.41 MSRP: $184.00You Save: $61.59 (34%)Ships in 1-2 Business Days


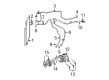
Dodge Ram 2500 Heater Hose Part Number: 55056966AA
$70.25 MSRP: $104.00You Save: $33.75 (33%)Ships in 1-3 Business Days


Dodge Ram 2500 Heater Hose Part Number: 55056965AA
$32.25 MSRP: $46.60You Save: $14.35 (31%)


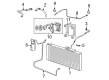
Dodge Ram 2500 A/C Line Part Number: 55056808AA
$110.40 MSRP: $155.00You Save: $44.60 (29%)


Dodge Ram 2500 Liquid Line, Rear Part Number: 55055960AA
$136.33 MSRP: $160.00You Save: $23.67 (15%)Ships in 1-2 Business Days

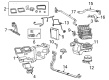
Dodge Ram 2500 Discharge Line Part Number: 55057006AF
$78.18 MSRP: $174.00You Save: $95.82 (56%)
Dodge Ram 2500 Suction Line Part Number: 55056865AD
$156.10 MSRP: $236.00You Save: $79.90 (34%)Ships in 1-2 Business Days
Dodge Ram 2500 Connector Tube Part Number: 68078245AA
$205.51 MSRP: $308.00You Save: $102.49 (34%)Ships in 1-2 Business Days

Dodge Ram 2500 Suction Line Part Number: 55057040AA


Dodge Ram 2500 Discharge Line Part Number: 55057039AA


Dodge Ram 2500 Liquid Line Part Number: 55056020AG


Dodge Ram 2500 A/C Line Part Number: 55055960AD


Dodge Ram 2500 Suction Line Part Number: 55057014AC


Dodge Ram 2500 Liquid Line Part Number: 55057088AE


Dodge Ram 2500 Liquid Line Part Number: 55055834AB


Dodge Ram 2500 Liquid Line Part Number: 55056541AC


Dodge Ram 2500 A/C Line Part Number: 55057015AD


Dodge Ram 2500 Suction Line Part Number: 55056715AE
| Page 1 of 3 |Next >
1-20 of 42 Results
Dodge Ram 2500 A/C Hose
Choose OEM A/C Hose that meet Dodge factory standards. Dodge designs and tests every component for precision and durability. Each A/C Hose follows strict manufacturing steps to lock in quality and fit. If your Dodge Ram 2500 matters to you, OEM parts make the smart choice. You'll get the exact look, feel, and performance you expect. Shop genuine Ram 2500 parts at the highly competitive prices online. Enjoy a manufacturer's warranty, a hassle-free return policy, and rapid delivery. No more guesswork with off brands. Get genuine parts with exact fit and true factory performance. Shop with confidence today at JeepPartsDeal.com.
The Dodge Ram 2500 A/C Hose is one of the key parts that signify that the Dodge Ram 2500 series is indeed a reliable vehicle with a measure of performance to boot. This A/C Hose comes in handy because it will enhance the circulation of the refrigerant throughout the A/C system, and from the compressor, to enhance cooling inside the cabin. The Dodge Ram 2500 A/C Hose is constructed with aluminum fittings to endure high pressures; therefore, reducing the possibility of leakage and increasing the general safety and effectiveness of the vehicle. Another one is compatibility, for this A/C Hose has been specifically engineered to suit most of the Ram 2500 car models so that owners of different generations can experience a significant improvement in the car's performance. This piece which is termed as Dodge Ram 2500 A/C Hose has a significant role to cover up by heating up the cabin and without the efficient extraction of heat this component adds its part to the performance of the vehicle. The automotive market appreciates its ruggedness, and the resistance it provides with no fuss about fitting it into the A/C system. Another is the A/C Hose that has a precision engineering design to increase the Ram 2500's total climate control efficiency. Summing up, the Dodge Ram 2500 A/C Hose is one of the car parts meaning a great deal to the brand's position and customers' safety and comfort when traveling.
Dodge Ram 2500 A/C Hose Parts and Q&A
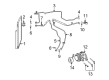
- Q: How to Remove the A/C Hose on a 5.7L Engine on Dodge Ram 2500?A:Began by removing and isolating the negative Battery Cable to unplug the A/C discharge line on a 5.7L engine. Take the refrigerant out of the refrigerant system. After that, remove the wire harness connector from the A/C pressure transducer. Unlatch the A/C discharge line nut and after that remove it from the A/C Condenser. Add the bracket to attach the A/C discharge line with the A/C suction line. Loosen the nut that holds the A/C discharge line to the A/C Compressor, separate the discharge line from the compressor and then remove that line. Eliminate the O-ring seals and gaskets and fit plugs into the opened discharge line connectors and tape the condenser and compressor ports. In certain situations, take out the A/C pressure transducer from the A/C discharge line.
- Q: How to Properly Install and Service an A/C Hose on a 5.7L Engine for Liquid Line on Dodge Ram 2500?A:Before putting on the A/C liquid line, set the refrigerant oil so the compressor is not damaged. For any situation where you are replacing numerous A/C parts, use the Refrigerant Oil Capacities chart to find the proper oil amount. Whenever you disconnect a refrigerant line, replace the O-ring and gasket to ensure there isn't a refrigerant leak. The A/C liquid line is built from a front and rear segment. Set the front metering section in the engine compartment, remove any tapes or plugs from the ends, moisten the O-ring seals with clean refrigerant oil and insert them on the front liquid line's spring-lock coupler fitting, using just the right O-ring seals designed for R-134a. Link the beginning section of the liquid line to its end, fit the secondary retaining clip and join the line into the body retaining clips. Apply grease to a new O-ring, place it with a new gasket on the front liquid line connector and then connect it to the A/C condenser port. Screw a nut onto the connection until it reaches 23 Nm (17 ft. lbs.) and afterward put the plastic cover on the condenser stud, along with the air filter housing mounting bracket and housing. Join the negative battery terminal, pump out the system and set the refrigerant oil at the correct level. In the rear section, insert the piece into the engine compartment, remove any sealing tape or plugs, lubricate new O-ring seals and put them onto the rear liquid line spring-lock coupler fitting. Secure the fitting between the evaporator tube and the rear of the system, put a secondary catch in place and link the line to the body retaining clip. Grease the new O-rings at the front liquid line fitting, join the rear section to the front section and fit the secondary retaining clip. Then, lift the air filter housing mounting bracket and set up the housing as well, attach the negative Battery Cable, evacuate the refrigerant system and check and fine-tune the oil level.


Related Dodge Ram 2500 Parts
 Dodge Ram 2500 Heater Core
 Dodge Ram 2500 A/C Compressor Clutch
 Dodge Ram 2500 Blend Door Actuator
 Dodge Ram 2500 Blower Motor Resistor
 Dodge Ram 2500 A/C Compressor
 Dodge Ram 2500 A/C Compressor Cut-Out Switches
 Dodge Ram 2500 A/C Condenser
 Dodge Ram 2500 A/C Expansion Valve
 Dodge Ram 2500 A/C Service Cap
 Dodge Ram 2500 A/C System Valve Core
 Dodge Ram 2500 Blower Motor
 Dodge Ram 2500 Evaporator
Browse Dodge Ram 2500 A/C Hose by Years
2010
2009
2008
2007
2006
2005
2004
2003
2002
2001
2000
1999
1998
1997
1996
1995
1994