JeepParts
My Garage
My Account
Cart
OEM Jeep Commander A/C Accumulator
Accumulator- Select Vehicle by Model
- Select Vehicle by VIN
Select Vehicle by Model
orMake
Model
Year
Select Vehicle by VIN
For the most accurate results, select vehicle by your VIN (Vehicle Identification Number).
1 A/C Accumulator found


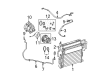
Jeep Commander Drier Part Number: 55038085AA
$112.62 MSRP: $170.00You Save: $57.38 (34%)Ships in 1-2 Business Days
Jeep Commander A/C Accumulator
Choose OEM A/C Accumulator that meet Jeep factory standards. Jeep designs and tests every component for precision and durability. Each A/C Accumulator follows strict manufacturing steps to lock in quality and fit. If your Jeep Commander matters to you, OEM parts make the smart choice. You'll get the exact look, feel, and performance you expect. Shop genuine Commander parts at the highly competitive prices online. Enjoy a manufacturer's warranty, a hassle-free return policy, and rapid delivery. No more guesswork with off brands. Get genuine parts with exact fit and true factory performance. Shop with confidence today at JeepPartsDeal.com.
Jeep Commander A/C Accumulator is an important component that ensures the reliability of the air conditioning system in the Jeep Commander of various models. As an interconnecting mechanism between the evaporator and the compressor, the A/C Accumulator is primarily involved with filtration that removes moisture, oil, and debris from the system; these are considerably damaging to the compressor hence their filtration is duly important. This reliability is paramount for temperature and pressure inside the cabin to be set and sustained especially during unfavourable weather conditions. New Jeep Commander XK and 2022 are also listed in its range and their A/C Accumulator supply is stable, which makes this car a reliable choice for those who need a comfortable mid-size Jeep SUV car. That's why A/C Accumulator is not only closely related to reliability of the cooling system of the vehicle but also to its safety by avoiding failures in the system and consequent overheating. Significantly, in the Jeep Commander A/C Accumulator we offer only high-quality products that are characterized by their workmanship, and at the same time have a number of features that are optimal for both city and off-road vehicles. This A/C Accumulator is suitable for most Jeep Commander models, which shows Jeep's devotion to providing you with the most comfortable and secure driving experience possible. Consequently, the Jeep Commander A/C Accumulator is a crucial factor of the auto vehicle's dispensation of the air conditioning section and a clear manifestation of the brand's commitment to quality and user satisfaction.
Jeep Commander A/C Accumulator Parts and Q&A
- Q: How to install an A/C Accumulator on Jeep Commander?A:The A/C accumulator should not be installed until the refrigerant oil level is correct to prevent A/C and compressor issues. Replacing the A/C accumulator is necessary if the internal failure of the A/C compressor has been detected. Whenever you have to change several A/C components at once, use the Refrigerant Oil Capacities chart to find out how much oil to add. When you change only the A/C accumulator, use 30 milliliters (1 fluid ounce) of the recommended oil for refrigerant. When opening a refrigerant line, be sure to replace the O-ring seals and gaskets so leaks are prevented. Put the A/C accumulator in the engine compartment, remove any tape or plugs from its fitting and the A/C Condenser port. Rub a tiny bit of refrigerant oil on a new dual-plane seal and fit it onto the accumulator fitting, checking that it matches the seal needed for your R-134a system. Couple the A/C accumulator to the end of the condenser and hold it in place with a nut (6) tightened to 20 Nm (15 ft. lbs.). Attach the A/C accumulator to the Radiator and fan shroud with screw (4) and tighten it to 5 Nm (44 in. lbs.). Apply clean refrigerant oil to another dual-plane seal and place it onto the A/C liquid line and hold it in place with nut (1), tightened to a torque of 20 Nm or 15 ft. lbs. After installing the housing and tube for the air cleaner, put in the Grille. Attach the negative Battery Cable again, remove the refrigerant and add 30 milliliters (1 fluid ounce) of oil to the A/C accumulator if you're using a new one. Use the chart on Refrigerant Oil Capacities to get the correct refrigerant oil amount for every support part. The next step is to charge the refrigerant system as the last step.

Related Jeep Commander Parts
 Jeep Commander Blend Door Actuator
 Jeep Commander Blower Motor
 Jeep Commander Blower Motor Resistor
 Jeep Commander Heater Core
 Jeep Commander A/C Compressor
 Jeep Commander A/C Compressor Clutch
 Jeep Commander A/C Condenser
 Jeep Commander A/C Expansion Valve
 Jeep Commander A/C Hose
 Jeep Commander A/C System Valve Core
 Jeep Commander Evaporator
 Jeep Commander HVAC Pressure Switch