JeepParts
My Garage
My Account
Cart
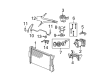
OEM 2001 Dodge Durango A/C Clutch
Air Conditioning Clutch- Select Vehicle by Model
- Select Vehicle by VIN
Select Vehicle by Model
orMake
Model
Year
Select Vehicle by VIN
For the most accurate results, select vehicle by your VIN (Vehicle Identification Number).
2 A/C Clutches found

2001 Dodge Durango Clutch & Pulley Part Number: 4882008
Product Specifications- Other Name: Clutch - A/C Compressor; A/C Compressor Clutch; Clutch Coil; Clutch; Clutch A/C Compressor
- Item Weight: 6.00 Pounds
- Item Dimensions: 6.8 x 6.6 x 2.1 inches
- Condition: New
- Fitment Type: Direct Replacement
- SKU: 4882008
- Warranty: This genuine part is guaranteed by Mopar's factory warranty.
2001 Dodge Durango Clutch & Pulley Part Number: 5016126AA
Product Specifications- Other Name: Clutch - A/C Compressor; A/C Compressor Clutch; Clutch; Compressor; Clutch A/C Compressor
- Item Weight: 6.50 Pounds
- Condition: New
- Fitment Type: Direct Replacement
- SKU: 5016126AA
- Warranty: This genuine part is guaranteed by Mopar's factory warranty.
2001 Dodge Durango A/C Clutch Parts and Q&A
- Q: How to Replace the A/C Clutch on 2001 Dodge Durango?A: Always begin by isolating the battery by separating it from the negative terminal and then pulling off the serpentine belt. Disconnect the wire from the clutch coil connector on the compressor. Use Special Tool 6462 from Kit 6460 to place the two pins into the holes of the clutch plate, then hold it still as you unscrew the hex nut. Then, take off the clutch plate and the clutch shims and finally remove the snap ring on the external front housing with your non-12 volt (DD) snap ring pliers. Place the lip of Special Tool C-6141-1 from Kit 6460 into the snap ring groove and attach the shaft protector (Special Tool C-6141-2 from the same kit). With C-6461 Special Tool, set the through-bolts and tighten them before moving on to gradually turning the puller's center bolt as you detach the rotor pulley. Undo the screw and retainer in the clutch coil lead wire harness on the front of the compressor, release the snap ring on the compressor hub and take out the clutch coil. First install the clutch field coil and snap ring, then attach the clutch coil lead wire harness retaining clip on the compressor front housing and tighten the retaining screw. Make sure the rotor assembly is centered on the front compressor housing hub, insert the handle of Special Tool 6464 into Special Tool 6143 and place the Special Tool 6143 assembly in the bearing cavity on the rotor so its outer edge rests solidly inside the rotor's inner race. Guide the driver until it bottoms on the compressor housing hub and listen for it to change sound to make sure it is resting properly. Put the external front rotor snap ring on with its bevel facing out so it seats properly and does not cause your clutch to fail. After that, install the original clutch shims on the compressor shaft, then put the clutch plate. Use Special Tool 6141-2 from Kit 6460 to press the clutch plate into place and keep tapping until it touches the shims, again making sure you notice a change in sound. Assemble the compressor shaft hex nut and apply 14.4 Nm (10.5 ft. lbs.) of pressure while tightening it. Verify the clutch air gap with a feeler gauge and change the shims as you must to reach the correct specification of 0.41 to 0.79 millimeter (0.016 to 0.031 inch) while keeping tension consistent around the clutch. While mounting a new clutch, put the shims that came with the clutch hardware into place.
Related 2001 Dodge Durango Parts
 2001 Dodge Durango Blower Motor
 2001 Dodge Durango Blend Door Actuator
 2001 Dodge Durango Blower Motor Resistor
 2001 Dodge Durango Evaporator
 2001 Dodge Durango A/C Accumulator
 2001 Dodge Durango A/C Compressor
 2001 Dodge Durango A/C Compressor Cut-Out Switches
 2001 Dodge Durango A/C Expansion Valve
 2001 Dodge Durango A/C Hose
 2001 Dodge Durango A/C Switch
 2001 Dodge Durango A/C System Valve Core
 2001 Dodge Durango Blower Control Switches