JeepParts
My Garage
My Account
Cart
OEM 2006 Dodge Caravan A/C Switch
Air Conditioning Switch- Select Vehicle by Model
- Select Vehicle by VIN
Select Vehicle by Model
orMake
Model
Year
Select Vehicle by VIN
For the most accurate results, select vehicle by your VIN (Vehicle Identification Number).
7 A/C Switches found

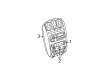
2006 Dodge Caravan Heater Control, Front Part Number: 5134624AC
$154.16 MSRP: $227.00You Save: $72.84 (33%)Ships in 1-2 Business DaysProduct Specifications- Other Name: Control - A/C And Heater; HVAC Temperature Control Panel, Front; Climate Control Module; Control Assembly; Dash Control Unit; Control A/C And Heater
- Position: Front
- Replaces: 5134624AB, 5134624AA
- Item Weight: 1.80 Pounds
- Item Dimensions: 13.7 x 5.1 x 4.8 inches
- Condition: New
- Fitment Type: Direct Replacement
- SKU: 5134624AC
- Warranty: This genuine part is guaranteed by Mopar's factory warranty.

2006 Dodge Caravan Heater Control, Front Part Number: 5134627AC
$163.71 MSRP: $357.00You Save: $193.29 (55%)Product Specifications- Other Name: Control - A/C And Heater; HVAC Temperature Control Panel, Front; Climate Control Module; Control Assembly; Dash Control Unit
- Position: Front
- Replaces: 5134627AB
- Item Weight: 1.70 Pounds
- Item Dimensions: 4.5 x 5.7 x 12.7 inches
- Condition: New
- Fitment Type: Direct Replacement
- SKU: 5134627AC
- Warranty: This genuine part is guaranteed by Mopar's factory warranty.


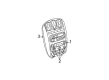
2006 Dodge Caravan Heater Control, Front Part Number: 5134626AC
Product Specifications- Other Name: Control - A/C And Heater; HVAC Temperature Control Panel, Front; Climate Control Module; Control Assembly; Dash Control Unit; Control A/C And Heater
- Position: Front
- Replaces: 5134626AA, 5134626AB
- Item Weight: 1.90 Pounds
- Item Dimensions: 12.4 x 5.7 x 4.5 inches
- Condition: New
- Fitment Type: Direct Replacement
- SKU: 5134626AC
- Warranty: This genuine part is guaranteed by Mopar's factory warranty.
2006 Dodge Caravan Heater Control, Front Part Number: 5136781AC
Product Specifications- Other Name: Control - A/C And Heater; HVAC Temperature Control Panel, Front; Climate Control Module; Control Assembly; Dash Control Unit; Control A/C And Heater
- Position: Front
- Replaces: 5136781AB, 5179779AA
- Item Weight: 1.90 Pounds
- Item Dimensions: 13.8 x 6.3 x 4.3 inches
- Condition: New
- Fitment Type: Direct Replacement
- SKU: 5136781AC
- Warranty: This genuine part is guaranteed by Mopar's factory warranty.
2006 Dodge Caravan Heater Control, Front Part Number: 5134625AC
Product Specifications- Other Name: Control - A/C And Heater; HVAC Temperature Control Panel, Front; Climate Control Module; Control Assembly; Dash Control Unit; Control A/C And Heater
- Position: Front
- Replaces: 5134625AA, 5134625AB
- Item Weight: 1.90 Pounds
- Item Dimensions: 12.9 x 5.5 x 4.5 inches
- Condition: New
- Fitment Type: Direct Replacement
- SKU: 5134625AC
- Warranty: This genuine part is guaranteed by Mopar's factory warranty.
2006 Dodge Caravan Control Unit, Front Part Number: 5005009AD
Product Specifications- Other Name: Control - A/C And Heater; HVAC Temperature Control Panel, Front; Climate Control Module; Heater Control; Control Assembly; Control A/C And Heater Rear Headliner; Control A/C And Heater
- Position: Front
- Item Weight: 0.90 Pounds
- Item Dimensions: 10.2 x 4.1 x 3.6 inches
- Condition: New
- Fitment Type: Direct Replacement
- SKU: 5005009AD
- Warranty: This genuine part is guaranteed by Mopar's factory warranty.

2006 Dodge Caravan Knob, Front Part Number: 5019526AA
Product Specifications- Other Name: A/C And Heater Control - Ro; HVAC Heater Control Knob, Front; Knob A/C And Heater Control - Rotary
- Position: Front
- Item Weight: 0.40 Pounds
- Item Dimensions: 1.6 x 1.5 x 1.3 inches
- Condition: New
- Fitment Type: Direct Replacement
- SKU: 5019526AA
- Warranty: This genuine part is guaranteed by Mopar's factory warranty.
2006 Dodge Caravan A/C Switch Parts and Q&A
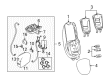
- Q: How to Service and Repair the Rear A/C Switch on 2006 Dodge Caravan?A: You should start by removing and isolating the negative battery cable before performing service on the rear A/c heater control. To access overhead rail controls, use a trim stick C-4755 or its equivalent, gently lift the rear A/c-heater control housing off the overhead rails, then them off and disconnect the wire harness connectors. Then, remove the three screws holding the rear A/c-heater control in place and pull out the control. Again for headliner mounted controls, the negative battery cable should be disconnected and held out of the way and then use the trim stick to raise the bezel's rear top edge slightly so the clips are released. Push the control bezel toward the dash to remove the assembly and pull out the wire harness. Remove the three screws holding the rear A/c-heater control to the bezel and lift the control out. For installation, fit the rear A/c-heater control into the housing or bezel where needed, thread in and tighten the three screws to 2 N.m (17 in. lbs.) and link the wire harness connector(S) to the back of the controller. Should the headliner be mounted, insert the long tabs on the back of the control bezel through the hole in the headliner and push firmly until the clips fasten into place. For overhead rail, mount the control housing over the rails and press it in until the clips click into position. Attach the negative battery cable again and then use the Drbiii(R) scan tool to reset the rear temperature selector. Ensure the Front Control Actuator Calibration is done and fix any problems that have been found. For the calibration, turn the Rear Temperature Selector clockwise in Cold and counterclockwise in Hot, alternating for 5 seconds each position.
Related 2006 Dodge Caravan Parts
 2006 Dodge Caravan Cabin Air Filter
 2006 Dodge Caravan Blend Door Actuator
 2006 Dodge Caravan Heater Core
 2006 Dodge Caravan Blower Motor
 2006 Dodge Caravan Blower Motor Resistor
 2006 Dodge Caravan A/C Accumulator
 2006 Dodge Caravan A/C Compressor
 2006 Dodge Caravan A/C Condenser
 2006 Dodge Caravan A/C Expansion Valve
 2006 Dodge Caravan A/C Hose
 2006 Dodge Caravan Blower Control Switches
 2006 Dodge Caravan Evaporator