JeepParts
My Garage
My Account
Cart
OEM Chrysler PT Cruiser Crankshaft
Crank Shaft- Select Vehicle by Model
- Select Vehicle by VIN
Select Vehicle by Model
orMake
Model
Year
Select Vehicle by VIN
For the most accurate results, select vehicle by your VIN (Vehicle Identification Number).
3 Crankshafts found


Chrysler PT Cruiser Crankshaft Part Number: 4781643AA
$539.13 MSRP: $818.00You Save: $278.87 (35%)Ships in 1-2 Business Days

Chrysler PT Cruiser Crankshaft Part Number: 4621917

Chrysler PT Cruiser Crankshaft Part Number: 68002690AA
Chrysler PT Cruiser Crankshaft
Choose OEM Crankshaft that meet Chrysler factory standards. Chrysler designs and tests every component for precision and durability. Each Crankshaft follows strict manufacturing steps to lock in quality and fit. If your Chrysler PT Cruiser matters to you, OEM parts make the smart choice. You'll get the exact look, feel, and performance you expect. Shop genuine PT Cruiser parts at the highly competitive prices online. Enjoy a manufacturer's warranty, a hassle-free return policy, and rapid delivery. No more guesswork with off brands. Get genuine parts with exact fit and true factory performance. Shop with confidence today at JeepPartsDeal.com.
Chrysler PT Cruiser Crankshaft Parts and Q&A
- Q: How is a Crankshaft Installed in an Engine on Chrysler PT Cruiser?A:Place the crankshaft in position by inserting its upper and lower halves so the bearing with the oil groove and hole is aligned within the engine block. The crankshaft uses five main bearings and both the upper and lower bearing shells in each of these have oil holes and grooves. End play in the crankshaft is controlled by a flanged bearing on the number three main bearing journal. First, add the main bearing upper shells and check that the oil openings match and that the tabs from the metal shells fit into the block's slots. Be sure not to use oil where the bed plate matches up to maintain how well the sealant protects. If your crankshaft has been machined, it should be balanced with the main bearing ring set up, not separately. Using Mopar(R) Brake Parts cleaner, clean the slots around the crankshaft and target ring and then dry them with compressed air. At the start, use new screws for your target ring and install them at #1 hole first. Once engaged, tighten all the screws to 13 Nm (110 in-lbs) with a T30 torx bit. Put a bead of Mopar(R) Bed Plate Sealant about 1.5 to 2.0 mm wide on the bed plate before setting the crankshaft into the engine block. Set the bottom main bearings into the main bearing cap/bed plate or plate, so that the tabs match up and then fix the plate to the engine block. Before you install them, put oil on bolts 11, 17 and 20 and tighten them with your fingers, then tighten them the rest of the way after you see the bed plate making contact with the cylinder block. With the number 4 piston at Tdc, rotate the crankshrust, press the rear of the barrel rearward to its limit, then move it forward to its limit and fit a tool between the rear of the barrel and the rear crankshaft counterweight to hold it in place. Tighten each bolt 1-10 to a torque of 41 Nm, take out the wedge tool and then tighten them all again to the same amount. Torque bolts 11-20 in sequence between 11-20 Nm (250 in. lbs.), tighten bolts 1-10 to 75 Nm (55 ft. lbs.) and then torque bolts 11-20 again to 28 Nm (250 in. lbs.). Check the main bearing bed plate has been correctly installed and then gauge the crankshaft turning torque, only allowing up to 5.6 Nm (50 in. lbs.). Put on the new connecting Rod Bearings and caps, but never use any of the old connecting rod bolts-torque them to 27 Nm (20 ft. lbs.) and then turn them 1/4 more. Set the balance shafts and housing, the oil pump and the oil pump pick-up tube into position, using 23 Nm (200 in. lbs.) for the fastener. Add the Oil Pan, install the crankshaft position sensor and secure the cylinder head after removal. Install the rear cover for the Timing Belt, seal for the front crankshaft, crankshaft sprocket, timing belt and the two timing belt front covers. Affix the support bracket for the engine mount and the crankshaft vibration damper. Following this, take out the old Oil Filter, disconnect and roll the engine under Dolly 6135 and Cradle 6710 and secure it with safety bands. After that, fit the crankshaft rear oil seal, mount the drive plate/flex plate using Mopar(R) Lock & Seal Adhesive on the bolts, tighten the bolts to 95 Nm (70 ft. lbs.), fit the transaxle to the engine using 101 Nm (75 ft. lbs.) on each set of bolts and fit the complete engine assembly.
- Q: How to Extract the Crankshaft from the Engine Assembly on Chrysler PT Cruiser?A:Make sure the engine in the vehicle is removed and the transaxle taken off the engine before disconnecting the crankshaft. After that, the drive plate/flex plate should be taken off along with the crankshaft rear oil seal. Next, put the engine onto a repair stand and remove the oil from the engine before taking out the Oil Filter. Remove the vibration damper and engine mount support bracket, then get rid of the front Timing Belt covers, the timing belt and the rear timing belt cover. Sorry, you must remove the Oil Pan (3), oil pump pick-up tube, crankshaft sprocket and oil pump as well. The balance shafts and the casing for them, along with the crankshaft position sensor, all need to be removed. If either the piston or connecting rod must be replaced, the cylinder head should be taken off. Each connecting rod cap should be identified by permanent ink or paint marker and never by punching or stamping, to avoid causing any harm. Remove all connecting rod bolts and caps with care so as not to harm the fracture rod and cap surfaces, because reusing the bolts is not allowed. All bolts holding the bed plate to the engine block must be released and the bedplate should be tapped until it comes loose from the dowel pins using a mallet, not forcing one area upward to prevent damage to the alignment and thrust bearing. The bed plate should come off from all the dowel pins smoothly, so it isn't damaged. Be sure to treat the crankshaft with special care because harming the main bearings can cause problems for the engine. Afterward, remove the target ring mounting screws and get rid of them, then proceed to remove the target ring from the crankshaft.


Related Chrysler PT Cruiser Parts
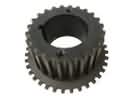 Chrysler PT Cruiser Crankshaft Gear
 Chrysler PT Cruiser Cylinder Head
 Chrysler PT Cruiser Cylinder Head Gasket
 Chrysler PT Cruiser Intake Valve
 Chrysler PT Cruiser Lash Adjuster
 Chrysler PT Cruiser Oil Pan Gasket
 Chrysler PT Cruiser Piston Ring Set
 Chrysler PT Cruiser Rod Bearing
 Chrysler PT Cruiser Timing Belt Idler Pulley
 Chrysler PT Cruiser Valve Cover Gasket
 Chrysler PT Cruiser Valve Stem Seal
 Chrysler PT Cruiser Variable Timing Sprocket