JeepParts
My Garage
My Account
Cart
OEM Chrysler Sebring Timing Chain
Engine Timing Chain- Select Vehicle by Model
- Select Vehicle by VIN
Select Vehicle by Model
orMake
Model
Year
Select Vehicle by VIN
For the most accurate results, select vehicle by your VIN (Vehicle Identification Number).
7 Timing Chains found


Chrysler Sebring Timing Chain Part Number: 4884868AC
$68.35 MSRP: $103.00You Save: $34.65 (34%)


Chrysler Sebring Timing Belt Part Number: 4663635
$141.63 MSRP: $209.00You Save: $67.37 (33%)


Chrysler Sebring Timing Chain Part Number: 4884870AB
$50.62 MSRP: $74.35You Save: $23.73 (32%)Ships in 1-2 Business Days


Chrysler Sebring Timing Chain Part Number: 4663674AD
$40.34 MSRP: $57.20You Save: $16.86 (30%)Ships in 1-2 Business Days


Chrysler Sebring Timing Chain Part Number: 4892349AA
$276.65 MSRP: $315.00You Save: $38.35 (13%)Ships in 1-2 Business Days
Chrysler Sebring Chain Part Number: 4663674AF
$64.67 MSRP: $73.15You Save: $8.48 (12%)Ships in 1-2 Business Days
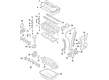
Chrysler Sebring Timing Chain Part Number: 4884868AB
Chrysler Sebring Timing Chain
Choose OEM Timing Chain that meet Chrysler factory standards. Chrysler designs and tests every component for precision and durability. Each Timing Chain follows strict manufacturing steps to lock in quality and fit. If your Chrysler Sebring matters to you, OEM parts make the smart choice. You'll get the exact look, feel, and performance you expect. Shop genuine Sebring parts at the highly competitive prices online. Enjoy a manufacturer's warranty, a hassle-free return policy, and rapid delivery. No more guesswork with off brands. Get genuine parts with exact fit and true factory performance. Shop with confidence today at JeepPartsDeal.com.
The Chrysler Sebring cars utilize a timing chain that helps in the rotation of the camshaft and crankshaft as it has the docket of correct valve timing important for the engine. Located in front of the engine, the Timing Chain has to be lubricated and is normally used in high power engines. Chrysler has been using metal timing chains on a number of its automotive models including the Sebring since the early Nineties, thus escaping this common problem that has affected many vehicles with rubber timing belts. Timing chains are usually very dependable but trouble may occur from the heart of lubrication or from the tensioner or the chain guides, and this is usually manifested as a rattle sound from the front of the car's engine. As for pushrod engine, the short chain drive which is desired in terms of low noise and small wearing part is appropriate for the Chrysler Sebring design.
Chrysler Sebring Timing Chain Parts and Q&A
- Q: How to Remove and Replace a Timing Chain on Chrysler Sebring?A:The engine should be placed in TDC with the Crankshaft timing mark at either (3) or (5), depending on the engine and the keyway should always be directly under the ladder frame mountings and at the 9 position. Grasp the both Camshaft timing marks so they have an identical look and are in contact with the gasket. Screw in the timing chain, matching the plated links to the timing marks on the camshaft sprockets and align the timing mark on the crankshaft sprocket with the matching link on the timing chain, so the tensioner side has slack. Add the Timing Chain Tensioner and turn the crankshaft two complete times clockwise so it again returns to the TDC position with the keyway pointing to 9 o'clock. Make sure the camshaft timing marks are lined up with the cylinder head cover sealing area; if they aren't, the chain is likely not installed properly. Place the front timing chain cover and connect the negative Battery Cable, then run the engine until it becomes warm, checking the levels of both the oil and the coolant.
- Q: How to Service and Repair a Timing Chain on Chrysler Sebring?A:The timing chain should be serviced after the negative Battery Cable is disconnected and the cooling system is drained. Peel off the upper Intake Manifold, remove the cylinder head covers and take off the Crankshaft vibration damper and timing chain cover. Always turn the crankshaft to move the engine when positioning the timing marks, so that valves and pistons are not harmed. Never start the engine. Instead, place the timing mark on the crankshaft sprocket at the oil pump housing mark which is found at 60 °ATDC of the first cylinder. When removing the timing chain with heads in place, do not turn either Camshaft or crankshaft without knowing the correct crankshaft position to prevent damage. Support the Power Steering Pump and bracket as a group, rather than separating them and breaking the connections and fasten them using a strap. Come off with the primary Timing Chain Tensioner cap and tensioner from the right cylinder head, take off the Camshaft Position Sensor from the left cylinder head and remove the cover plugs for the timing chain guides on both cylinder heads. If the camshaft sprocket bolts are taken out, the camshafts turn in the clockwise direction. Before you begin, change the camshaft sprocket, then remove the bolts that fix the sprocket in place and recover the camshaft damper (if you have it). First, remove the attaching bolts and the sprocket from the left side camshaft, then remove the lower chain guide and tensioner arm and finish by taking out the primary timing chain. Before taking out the crankshaft sprocket, make sure you remove the primary timing chain and be careful not to turn the crankshaft. Assemble the damper bolt first, grease the bolt head, install Special Tools 5048, 5048 and 859 on the sprocket and crankshaft nose and then remove the sprocket. When setting up, inspect all your sprockets and chain guides and if anything appears worn, replace it. If short chain guides on either side are removed, fit new right and left side guides and tighten the bolts attaching them to 28 Nm (250 in. lbs.). Place the crankshaft sprocket timing mark next to the corresponding mark on the oil pump housing, oil the guides on the timing chain, fit the left side primary chain sprocket onto the chain and make sure the timing mark is located between the two plated timing links. Go easy with the chain under the left cylinder and let the camshaft sprockets slide as you insert them into the cylinder head. Carefully lay the left camshaft sprocket onto the camshaft hub, bring the timing gun link into contact with the crankshaft timing mark and place the front chain onto the water pump sprocket. Place the camshaft sprocket timing mark over the link on the timing chain on the timing plate and, without applying pressure, set it over the camshaft hub. Ensure all chain timing plated links align with the timing marks on the sprockets, put in left side lower chain guide and tensioner arm and tighten them with bolts at 28 Nm (250 in. lbs.). Before you use them, inspect the O-ring on each chain guide access plug and change if it needs it. Put chain guide access plugs into the cylinder heads and tighten them to 20 Nm (15 ft. lbs.). The first step is to use Special Tool 8186: place the check ball end of the tensioner into the shallow part and depress the tensioner slowly to remove the oil. Place the cylinder plunger in the further position of Special Tool 8186 and press down until the tensioner is reset. You must reset the tensioner, since improper setting could cause the motor to jam. Drop the reset chain tensioner into the right cylinder head, align the tensioner retaining plate and bolt each tensioner to its seat with 12 Nm (105 in. lbs.) torque. Once at the indicated cylinder bank, insert the camshaft damper (if you have it) on the camshaft's center hub, then position a 3/8" square drive extension with a breaker bar into the receptacle in the variable valve camshaft. Turn the camshaft to make the camshaft hub line up with the camshaft-sprocket and damper holding holes. Place the attaching bolts into the sprocket, then tighten them to 28 Nm (250 in.-lb). Place a 3/8" square drive extension onto the breaker bar and insert it into the intake camshaft drive hub. Turn the left side camshaft until the sprocket's bolts can be installed, then tighten to 28 Nm (250 in. lbs.). Rotate the engine slightly clockwise, touch the tensioner arm gently using a flat-bladed pry tool and subsequently check if it has been activated while tense. Mount the power steering pump with its bracket to the engine, add the camshaft position sensor and link the sensor's electrical connector. Replace the timing chain cover, the vibration damper on the crankshaft and the cylinder head covers, followed by the upper intake manifold. Whenever you install a reset tensioner, the engine may make some noise after it starts for the first time, but this will be gone after 5-10 seconds. Fill the coolant and connect the negative battery cable once more. When installing the crankshaft sprocket, hold Special Tools 6780-1 and 8179 until it reaches the bottom of the crankshaft's step flange, making sure not to spin the crankshaft. Place a pin gauge between the crankshaft's end and the sprocket outer face and read a measurement of 39.05 ± 0.50 mm (1.5374 ± 0.020 in.). Install the primary timing chain after the sprocket is at the proper depth.


Related Chrysler Sebring Parts
 Chrysler Sebring Balance Shaft Chain
 Chrysler Sebring Dipstick
 Chrysler Sebring Exhaust Valve
 Chrysler Sebring Intake Valve
 Chrysler Sebring Oil Filler Cap
 Chrysler Sebring Oil Filter Housing
 Chrysler Sebring Oil Pan
 Chrysler Sebring Piston
 Chrysler Sebring Piston Ring Set
 Chrysler Sebring Rocker Arm Pivot
 Chrysler Sebring Timing Belt Idler Pulley
 Chrysler Sebring Valve Cover Gasket