JeepParts
My Garage
My Account
Cart
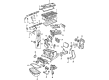
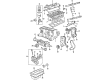
OEM Chrysler Sebring Camshaft
Cam- Select Vehicle by Model
- Select Vehicle by VIN
Select Vehicle by Model
orMake
Model
Year
Select Vehicle by VIN
For the most accurate results, select vehicle by your VIN (Vehicle Identification Number).
24 Camshafts found


Chrysler Sebring Exhaust Camshaft Part Number: 4884736AC
$220.27 MSRP: $457.00You Save: $236.73 (52%)Ships in 1-3 Business Days


Chrysler Sebring Camshaft Part Number: 4781681AB
$299.46 MSRP: $457.00You Save: $157.54 (35%)

Chrysler Sebring Camshaft Part Number: MD350233
$26.98 MSRP: $34.21You Save: $7.23 (22%)Ships in 1-2 Business Days


Chrysler Sebring Camshaft Part Number: MD350234
$30.09 MSRP: $38.14You Save: $8.05 (22%)Ships in 1-2 Business Days
Chrysler Sebring Camshaft Part Number: 4781679AB
$220.27 MSRP: $457.00You Save: $236.73 (52%)Ships in 1-2 Business Days
Chrysler Sebring Intake Camshaft Part Number: 4884735AC
$221.09 MSRP: $459.00You Save: $237.91 (52%)Ships in 1-2 Business Days
Chrysler Sebring Camshaft Part Number: 4792743AB
$786.70 MSRP: $1075.00You Save: $288.30 (27%)Ships in 1-2 Business Days


Chrysler Sebring Camshaft Part Number: 4792063AB


Chrysler Sebring Camshaft Part Number: MD362422


Chrysler Sebring Camshaft Part Number: MD318241


Chrysler Sebring Camshaft Part Number: 4792058AB


Chrysler Sebring Camshaft Part Number: 4792744AA
Chrysler Sebring Camshaft Part Number: MD351710
Chrysler Sebring Camshaft Part Number: MD321178


Chrysler Sebring Camshaft Part Number: 4792063
Chrysler Sebring Camshaft Part Number: 4792062

Chrysler Sebring Camshaft Part Number: 4792059
Chrysler Sebring Camshaft Part Number: 4792058

Chrysler Sebring Camshaft Part Number: 4777638AA

Chrysler Sebring Camshaft Part Number: 4777629AA
| Page 1 of 2 |Next >
1-20 of 24 Results
Chrysler Sebring Camshaft
Choose OEM Camshaft that meet Chrysler factory standards. Chrysler designs and tests every component for precision and durability. Each Camshaft follows strict manufacturing steps to lock in quality and fit. If your Chrysler Sebring matters to you, OEM parts make the smart choice. You'll get the exact look, feel, and performance you expect. Shop genuine Sebring parts at the highly competitive prices online. Enjoy a manufacturer's warranty, a hassle-free return policy, and rapid delivery. No more guesswork with off brands. Get genuine parts with exact fit and true factory performance. Shop with confidence today at JeepPartsDeal.com.
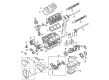
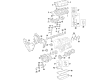
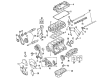
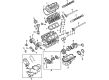
The camshaft in Chrysler Sebring vehicles is highly responsible for regulating the operations of the intake and exhaust valves in the engine thus allowing the passage of the air/fuel mixture and discharge of exhaust gases respectively. Usually made-up of iron or steel, the Chrysler Sebring camshaft functions in different ways, Over Head Valve (OHV), Single Over Head Cam (SOHC) together with Double Over Head Cam (DOHC) makes up the Chrysler Sebring camshaft. All of them impact the power output of the engine in their various manners, for instance, DOHC solutions enable the independent management of intake and exhaust camshafts. Camshafts in Chrysler Sebring models employ timing belts or chains using the crankshaft so as to arrive at the correct phase with pistons. High performance camshafts used in can improve power flow and efficiency as well as offers high lift and long duration for air flow. Other parameter define the camshaft, LSA or Lobe Separation Angle, thereby determining torque and idle quality.
Chrysler Sebring Camshaft Parts and Q&A
- Q: How to Ensure Proper Alignment and Measurement When Removing and Installing a Camshaft on Chrysler Sebring?A:Before moving the camshaft, unbolt the main Timing Chain and chain tensioner, as the engine's manufacturer will have marked the first exhaust camshaft bearing as "IE>". Start by removing the camshaft bearing cap bolts in the reversed order you tightened them in and then take out the caps, the camshafts, the secondary chain and the tensioner all at one time. Pull the tensioner and chain off the camshaft and examine both for signs of damage, binding, worn sprockets and odd wear on the cam lobes. If a problem is found, replace the camshaft. Actual wear is determined and found acceptable if it is at most 0.0254 mm (0.001 inch) using the standard and if it doesn't exceed 0.254 mm (0.010 inch). You should ensure the proper crankshaft position is located before rotating the timing chain, to protect the valve and piston from damage. Attach the links of the camshaft chain to the cams, facing them toward the engine and match the dots on the camshaft sprocket. Should the tensioner remain in the locked and compressed state, insert it between the camshafts and chain after pressing and locking it in a soft jaw vise. Ensure the plated links and dots are on the left at 12:00 O'clock before putting the cams onto the cylinder and securing them. Place the camshaft bearing caps in the spots they occupied earlier and tighten the bolts steadily to 12 Nm (105 inch lbs.), using the right order. Following this, attach the secondary chain tensioner bolts, tighten them to 12 Nm (105 inch lbs.), take off the locking pin from the secondary tensioners, measure the end play of the camshafts and place the primary timing chain.
- Q: How to Remove and Replace a Camshaft on Chrysler Sebring?A:Before starting to work on the camshaft, pull off the cylinder head cover, Camshaft Position Sensor and the camshaft target magnet and afterward, take off the Timing Belt. After that, remove the sprockets and the cover at the rear of the timing belt. Each bearing cap should be marked for its position and the outside ones have to be removed first. Use the exact sequence for loose removal of the camshaft bearing cap fasteners, separating one camshaft at a time, since cams should not be switched due to difference in the width and space of the cam bearing area on cam 6. Figuring out the camshafts first, pull them out after they are exposed on the head. If you take out the Rocker Arms, keep them labeled to put them back in their proper positions. Clean the camshaft using the chosen solvent and check the condition of the camshaft bearing journals. If there is binding, examine the cylinder head for harm and examine the oil holes to confirm they are unblocked. Look for any wear or damage on the cam lobe and bearings and replace the camshaft when there's a defect. Take the actual camshaft corrosion with a standard of 0.0254 mm and maximum limit at 0.254 mm; hey, change the camshaft when worn excessively. During camshaft installation, make sure the cylinder with the piston at top dead center is not selected. After lubricating the bearing journals, the rocker arms and the camshaft lobes, set each rocker arm in its proper original place if it is being used again. Put the camshafts into the cylinder head bearing journals and put on the bearing caps, both using the right-left order and tightening each to 12 Nm (105 inch lbs.). Coat the No. 1 and No. 6 bearing ends with Mopar Gasket Maker, put them in their holes, fasten up and tighten the fasteners to 28 Nm (250 inch lbs.). Installing the bearings comes before putting in the seals. After that, add the oil seals on the camshafts, fit the target magnet for the camshaft, place the position sensor and secure the cylinder head cover, rear timing belt cover and belt.


Related Chrysler Sebring Parts
 Chrysler Sebring Timing Belt
 Chrysler Sebring Timing Chain
 Chrysler Sebring Camshaft Thrust Plate
 Chrysler Sebring Crankshaft Thrust Washer
 Chrysler Sebring Exhaust Valve
 Chrysler Sebring Oil Pan
 Chrysler Sebring Oil Pan Gasket
 Chrysler Sebring Piston
 Chrysler Sebring Piston Ring Set
 Chrysler Sebring Rocker Arm Pivot
 Chrysler Sebring Timing Cover Gasket
 Chrysler Sebring Valve Cover Grommet