JeepParts
My Garage
My Account
Cart
OEM Dodge Stratus Air Bag
Air Bag Module- Select Vehicle by Model
- Select Vehicle by VIN
Select Vehicle by Model
orMake
Model
Year
Select Vehicle by VIN
For the most accurate results, select vehicle by your VIN (Vehicle Identification Number).
33 Air Bags found

Dodge Stratus Passenger Air Bag, Blue, Upper Passenger Side Part Number: RD43YBPAM
$127.80 MSRP: $810.00You Save: $682.20 (85%)Ships in 1-2 Business DaysDodge Stratus Passenger Air Bag, Dark Gray/Taupe, Upper Passenger Side Part Number: RD43WL8AM
$110.45 MSRP: $700.00You Save: $589.55 (85%)Ships in 1-2 Business DaysDodge Stratus Passenger Air Bag, Sandstone, Upper Passenger Side Part Number: RD43XTMAM
$112.02 MSRP: $710.00You Save: $597.98 (85%)Ships in 1-2 Business DaysDodge Stratus Passenger Air Bag, Green, Upper Passenger Side Part Number: RD43ZP7AM
$126.23 MSRP: $800.00You Save: $673.77 (85%)Ships in 1-2 Business DaysDodge Stratus Passenger Air Bag, Dark Gray/Taupe, Upper Passenger Side Part Number: RD43XDVAM
$129.34 MSRP: $729.00You Save: $599.66 (83%)Ships in 1-2 Business Days
Dodge Stratus Inflator Module, Driver Side Part Number: PH40RJLAE
$60.77 MSRP: $349.00You Save: $288.23 (83%)Ships in 1-2 Business Days
Dodge Stratus Driver Air Bag, Sandstone, Driver Side Part Number: RB61XTMAC
$525.96 MSRP: $834.00You Save: $308.04 (37%)Ships in 1-2 Business Days

Dodge Stratus Driver Air Bag, Black, Driver Side Part Number: PK46RX8
$40.12 MSRP: $50.86You Save: $10.74 (22%)Ships in 1-2 Business DaysDodge Stratus Passenger Air Bag, Passenger Side Part Number: SD05RJLAA
$40.12 MSRP: $50.86You Save: $10.74 (22%)Ships in 1-2 Business Days
Dodge Stratus Driver Air Bag, Camel Tan, Driver Side Part Number: PK46SKB
$131.64 MSRP: $166.88You Save: $35.24 (22%)Ships in 1-2 Business DaysDodge Stratus Passenger Air Bag, Passenger Side Part Number: SD05LAZAA
$147.06 MSRP: $186.42You Save: $39.36 (22%)Ships in 1-2 Business Days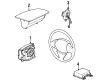
Dodge Stratus Passenger Air Bag, Blue/Mist Gray, Passenger Side Part Number: SD05RC8AA
$83.99 MSRP: $106.47You Save: $22.48 (22%)Ships in 1-2 Business DaysDodge Stratus Passenger Air Bag, Gold/Maroon Part Number: SD05REEAA


Dodge Stratus Inflator Module, Driver Side Part Number: PH40RC8AC
| Page 1 of 2 |Next >
1-20 of 33 Results
Dodge Stratus Air Bag
Choose OEM Air Bag that meet Dodge factory standards. Dodge designs and tests every component for precision and durability. Each Air Bag follows strict manufacturing steps to lock in quality and fit. If your Dodge Stratus matters to you, OEM parts make the smart choice. You'll get the exact look, feel, and performance you expect. Shop genuine Stratus parts at the highly competitive prices online. Enjoy a manufacturer's warranty, a hassle-free return policy, and rapid delivery. No more guesswork with off brands. Get genuine parts with exact fit and true factory performance. Shop with confidence today at JeepPartsDeal.com.
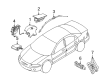
Dodge Stratus Air Bag stands as a premier reliability component which delivers performance benefits for occupant safety during car accidents. A total of ten airbag modules can deploy inside select Dodge Stratus vehicles through the driver and passenger and side-impact airbag ensemble. The Dodge Stratus Air Bag system functions with advanced crash sensors that enable quick communication to an electronic controller which results in the essential deployment of airbags during collisions. Safety remains a core feature distinguishing the Dodge Stratus which emerged in 1995 and continued its production until 2005 through its two generations period. The Dodge Stratus Air Bag increases automotive safety for occupants and improves operational vehicle performance since it makes protection effortless for drivers. The Dodge Stratus tackles two important customer needs by delivering strong engine options and excellent fuel economy thus making it attractive to cost-saving drivers looking for safety in their vehicle. The the automaker model stands out as a dependable vehicle through its distinct design features and dependable airbag system which creates an excellent blend of safety and performance characteristics. The car Air Bag demonstrates the vehicle's crucial dedication to protect passengers which Dodge sets it apart from competition in the mid-size car market.
Dodge Stratus Air Bag Parts and Q&A
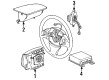
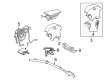
- Q: How to Safely Remove an Air Bag Module Without Deployment on Dodge Stratus?A:Before releasing the Passenger air bag Module, you should remove the battery negative remote cable. Remove the Glove Box entirely so you can access the screw in the Passenger air bag Module. Separate the wire connector from the Passenger air bag Module, after which take out the four nuts and two screws holding the air bag assembly to the instrument panel collar. Lift out the Passenger air bag Module from its place inside the panel cavity. When installing, go in the reverse order, putting in a new Passenger air bag Module and fixing the nut torque to 11 Nm (100 in. lbs.) and the screws to 2 Nm (20 in. lbs.). After finishing the air bag System Test procedures, connect the battery negative remote cable.
- Q: How to Safely Replace and Install a Deployed Air Bag on Dodge Stratus?A:When the air bag deploys, the entire instrument panel and pad assembly should be replaced. Initially, unplug and isolate the battery negative lead to the air bag remote cable, then wait at least two minutes for the system reserve capacitor to have all its energy used up before working on the air bag. Never remove the Glove Box; instead, fully open and lower it to get to the screws for the passenger air bag inside. Remove the wire connector from the passenger air bag and then break the four attachments, two nuts and two screws, connecting the air bag to the collar on the instrument panel. Below the top of the passenger air bag, hid in its outer area, are the two nuts. The two screws go through the tabs at the front bottom of the instrument panel reinforcement. Break the tabs that hold the air bag door to the instrument panel and remove the air bag from the cavity in the panel. When performing an installation because the Passenger air bag was deployed, use a new instrument panel and pad assembly and move all the other components as well. While the battery is removed, place the Passenger air bag into the panel cavity and press the air bag door tabs to lock into the retainer on the instrument panel. Put in the air bag assembly with the two nuts to the instrument panel collar and the two screws, making sure to tighten them to 7.5 ± 1 Nm (66 in. lbs.). Next, join the Passenger air bag wire connector back into place and then squeeze the sides of the glove compartment, raising it up into the space in front of the gauges. You should not connect the negative Battery Cable until you have checked and tested the air bag system.


Related Dodge Stratus Parts
 Dodge Stratus Air Bag Control Module
 Dodge Stratus Air Bag Sensor
 Dodge Stratus Antenna Mast
 Dodge Stratus Brake Light Switch
 Dodge Stratus Clock Spring
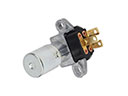 Dodge Stratus Dimmer Switch
 Dodge Stratus Headlight Switch
 Dodge Stratus Ignition Lock Assembly
 Dodge Stratus Ignition Lock Cylinder
 Dodge Stratus Ignition Switch
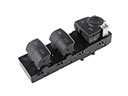 Dodge Stratus Power Window Switch
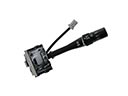 Dodge Stratus Wiper Switch