JeepParts
My Garage
My Account
Cart
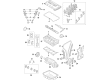
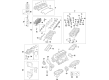
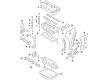
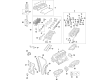
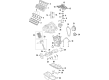
OEM Jeep Crankshaft
Crank Shaft- Select Vehicle by Model
- Select Vehicle by VIN
Select Vehicle by Model
orMake
Model
Year
Select Vehicle by VIN
For the most accurate results, select vehicle by your VIN (Vehicle Identification Number).
37 Crankshafts found


Jeep Crankshaft Part Number: 5047374AC
$605.54 MSRP: $914.00You Save: $308.46 (34%)Ships in 1-2 Business DaysProduct Specifications- Replaces: 5048537AA


Jeep Crankshaft Part Number: 68136832AB
$514.02 MSRP: $2810.00You Save: $2295.98 (82%)Ships in 1-2 Business DaysProduct Specifications- Other Name: Crankshft
- Replaces: 68136832AA, 68018731AA, 5175344AA, 5179462AA

Jeep Crankshaft Part Number: 68212067AA
$436.48 MSRP: $663.00You Save: $226.52 (35%)Ships in 1-2 Business DaysProduct Specifications- Other Name: Crankshaft - Engine; Crankshaft Kit Engine Including Bearings


Jeep Crankshaft Part Number: 4781643AA
$539.13 MSRP: $818.00You Save: $278.87 (35%)Ships in 1-2 Business DaysProduct Specifications- Other Name: Crankshft; Crankshaft Includes Target Ring And Screw

Jeep Crankshaft Part Number: 4884563AD
$681.79 MSRP: $1045.00You Save: $363.21 (35%)Ships in 1-2 Business DaysProduct Specifications- Other Name: Crankshft


Jeep Crankshaft Part Number: 68088026AD
$703.89 MSRP: $1075.00You Save: $371.11 (35%)Ships in 1-2 Business DaysProduct Specifications- Replaces: 68088026AC, 68088026AB

Jeep Crankshaft Part Number: 68517266AA
$794.50 MSRP: $1210.00You Save: $415.50 (35%)Product Specifications- Other Name: Crankshaft - Engine; Crankshaft Kit Engine Including Bearings


Jeep Crankshaft Part Number: 5038339AG
$1069.51 MSRP: $1455.00You Save: $385.49 (27%)Product Specifications- Other Name: Crankshft
- Replaces: 5038339AE, 5038339AF, 5038339AD


Jeep Crankshaft Part Number: 4893950AC
$646.43 MSRP: $975.00You Save: $328.57 (34%)Ships in 1-2 Business DaysProduct Specifications- Other Name: Crankshaft - Engine
- Replaces: 4893950AB, 68253313AA

Jeep Crankshaft Part Number: 5184251AI
$849.75 MSRP: $1285.00You Save: $435.25 (34%)Ships in 1-2 Business DaysProduct Specifications- Other Name: Crankshft
- Replaces: 5184251AG, 4893934AB, 5184251AH, 5184251AF


Jeep Crankshaft Part Number: 68191817AA
$460.29 MSRP: $670.00You Save: $209.71 (32%)Ships in 1-3 Business DaysProduct Specifications- Other Name: Crankshaft - Engine; Crankshaft Kit Engine

Jeep Crankshaft Part Number: 68293005AB
$1095.45 MSRP: $1505.00You Save: $409.55 (28%)Product Specifications- Other Name: Crankshft
- Replaces: 5038339AC, 68293005AA


Jeep Crankshaft Part Number: 53020959
$543.00 MSRP: $688.35You Save: $145.35 (22%)Ships in 1-2 Business DaysProduct Specifications- Other Name: Crankshft


Jeep Crankshaft Part Number: 53021302BB
$215.27 MSRP: $317.00You Save: $101.73 (33%)Product Specifications- Other Name: Crankshft; Crankshaft See Note


Jeep Crankshaft Part Number: 53020959AB
Product Specifications- Other Name: Crankshft; Crankshaft See Note


Jeep Crankshaft Part Number: 53021302AD
Product Specifications- Other Name: Crankshft; Crankshaft Includes Tone Ring And Tone Ring Mounting Screws


Jeep Crankshaft Part Number: 5037458BD
Product Specifications- Other Name: Crankshft
- Replaces: 5037458AB, 5037458AC, 5037458AA


Jeep Crankshaft Part Number: 53022286AA
Product Specifications- Other Name: Crankshft; Crankshaft See Note


Jeep Crankshaft Part Number: 53021302BC
Product Specifications- Other Name: Crankshft; Crankshaft See Note


Jeep Crankshaft Part Number: 68147110AB
Product Specifications- Replaces: 68147110AA
| Page 1 of 2 |Next >
1-20 of 37 Results
Jeep Crankshaft
OEM parts sourced directly from Jeep deliver superior quality, long lasting strength, and a precise fit you can trust. Each item goes through strict quality checks to ensure safety, toughness, and performance that matches your factory equipment. At JeepPartsDeal online shop, you'll get top-quality, budget-friendly OEM Jeep Crankshaft for your vehicle. We focus on giving you a high standard without pushing up the price. Our full selection of genuine factory products comes backed by the original manufacturer's warranty. You'll love our fast delivery, seamless shopping experience, and convenient return policy, saving you all the hassle.
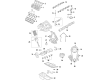
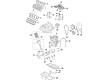
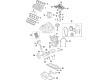
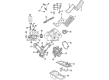
Jeep Crankshaft converts piston power to rotating power that propels all trail-capable adventures. Jeep established a reputation for wartime ruggedness followed by a doubling that was done by civilian rigs designed to run on dirt and snow. Switchable traction modes allow drivers to switch between mud and sand without reducing convoy speed. Jeep retains cabins that are open to the sky but wires the dashboard with voice control and over-the-air modifications. The community is very strong because owners exchange tips, map routes, and show that a Jeep can be as hard as it can work. These rigs are provided with sturdy frames, minimal overhangs, and straightforward mechanicals in their attitude to go anywhere. At the center of any engine is the Crankshaft, either forged or cast in order to withstand brutal torsion at redline. The machined journals of the Crankshaft rotate between oil-slick bearings with counterweights reducing vibration, holding connecting rods in perfect harmony as the horsepower drives through the driveshaft. It is on this backbone that Jeep relies to achieve the transformation of raw combustion to forward movement wherever you point the wheels. Crankshaft design combines high-carbon steel as a strength source with intelligent oil passages that reduce heat and limit service life. Frequent monitoring of oil flow and balance checks at the right time allow the Crankshaft to revolve mile after mile.
Jeep Crankshaft Parts and Q&A
- Q: What is the procedure for crankshaft installation during engine reassembly on Jeep Cherokee?A:Crankshaft installation is the first step in engine reassembly. It's assumed at this point that the engine block and crankshaft have been cleaned, inspected and repaired or reconditioned. Position the engine with the bottom facing up. Remove the main bearing cap bolts and lift out the caps. Lay them out in the proper order to ensure correct installation. If they're still in place, remove the original bearing inserts from the block and the main bearing caps. Wipe the bearing surfaces of the block and caps with a clean, lint-free cloth. They must be kept spotlessly clean. Clean the back sides of the new main bearing inserts and lay one in each main bearing saddle in the block. Lay the other bearing from each set in the corresponding main bearing cap. Make sure the tab on the bearing insert fits into the recess in the block or cap. Caution: The oil holes in the block must line up with the oil holes in the bearing insert. Do not hammer the bearing into place and don't nick or gouge the bearing faces. No lubrication should be used at this time. The flanged thrust bearing must be installed in the proper cap and saddle. On four-cylinder engines it is number two (counting from the front of the engine); on all six-cylinder engines it's number three. Clean the faces of the bearings in the block and the crankshaft main bearing journals with a clean, lint-free cloth. Check or clean the oil holes in the crankshaft, as any dirt here can go only one way - straight through the new bearings. Once you're certain the crankshaft is clean, carefully lay it in position in the main bearings. Before the crankshaft can be permanently installed, the main bearing oil clearance must be checked. Cut several pieces of the appropriate size Plastigage (they must be slightly shorter than the width of the main bearings) and place one piece on each crankshaft main bearing journal, parallel with the journal axis. Clean the faces of the bearings in the caps and install the caps in their respective positions (don't mix them up) with the arrows pointing toward the front of the engine. Don't disturb the Plastigage. Starting with the center main and working out toward the ends, tighten the main bearing cap bolts, in three steps, to the specified torque. Don't rotate the crankshaft at any time during this operation. Remove the bolts and carefully lift off the main bearing caps. Keep them in order.
- Q: How to measure crankshaft endplay and remove the crankshaft on Jeep Wrangler?A:Before removing the crankshaft, measure the endplay by mounting a dial indicator aligned with the crankshaft and touching its end. Pry the crankshaft to the rear and zero the dial indicator, then pry it to the front and check the reading; the distance traveled indicates the endplay, which typically ranges from 0.003 to 0.010 inches (0.076 to 0.254 mm). If the endplay exceeds this range, inspect the crankshaft thrust surfaces for wear after removal, and if no wear is found, new main bearings should resolve the issue. If a dial indicator is unavailable, use feeler gauges by prying the crankshaft to the front and slipping the gauges between the crankshaft and the thrust bearing or washer to measure clearance. For 3.6L V6 engines, remove the windage tray bolts in reverse order of installation. For 2.5L four-cylinder and six-cylinder engines, check if the main bearing caps are marked for their locations, numbering them consecutively from front to rear if necessary, and ensure the cast-in arrow on the main cap points to the front. For 2.4L four-cylinder engines, loosen the main bearing cap/bed plate fasteners gradually until they can be removed by hand, taking care not to drop the bearing inserts. For 3.6L V6 engines, remove the windage tray bolts, main cap bolts, and cross-bolts, purchasing new bolts for reassembly, and tap the caps with a soft-face hammer to separate them from the block, using bolts as levers if needed. For 2007 and later 3.8L V6 engines, remove the main cap cross-bolts and purchase new ones for reassembly, while for all other engines, follow the same procedure as previously described. Finally, carefully lift the crankshaft out of the engine, ideally with assistance due to its weight, and with the bearing inserts in place, reinstall the main bearing caps/bed plate onto the engine block, tightening the fasteners finger-tight.


Related Jeep Parts
 Jeep Oil Filter
 Jeep Rocker Arm
 Jeep Valve Cover Gasket
 Jeep Valve Cover Grommet
 Jeep Camshaft Thrust Plate
 Jeep Crankshaft Pulley
 Jeep Dipstick Tube
 Jeep Lash Adjuster
 Jeep Motor And Transmission Mount
 Jeep Oil Pump Gasket
 Jeep Oil Pump Rotor Set
 Jeep Valve Guide