JeepParts
My Garage
My Account
Cart
OEM Jeep Wrangler Thermostat
Engine Coolant Thermostat- Select Vehicle by Model
- Select Vehicle by VIN
Select Vehicle by Model
orMake
Model
Year
Select Vehicle by VIN
For the most accurate results, select vehicle by your VIN (Vehicle Identification Number).
9 Thermostats found


Jeep Wrangler Thermostat (Not Including Gaskets) Part Number: 52028186AC
$38.76 MSRP: $56.70You Save: $17.94 (32%)Ships in 1-2 Business Days


Jeep Wrangler Thermostat Housing Part Number: 68273161AA
$62.66 MSRP: $93.65You Save: $30.99 (34%)Ships in 1-2 Business Days


Jeep Wrangler Thermostat Housing Part Number: 68253514AA
$197.65 MSRP: $296.00You Save: $98.35 (34%)

Jeep Wrangler Thermostat Housing Part Number: 4893926AH
$64.34 MSRP: $96.20You Save: $31.86 (34%)
Jeep Wrangler Thermostat Housing Part Number: 5048714AA
$151.61 MSRP: $226.00You Save: $74.39 (33%)Ships in 1-2 Business Days
Jeep Wrangler Thermostat Part Number: 53010552AC
$38.42 MSRP: $56.25You Save: $17.83 (32%)Ships in 1-2 Business Days

Jeep Wrangler Thermostat Part Number: 52028898AJ
$69.58 MSRP: $91.75You Save: $22.17 (25%)
Jeep Wrangler Thermostat And Housing Part Number: 5048424AD
$161.71 MSRP: $240.00You Save: $78.29 (33%)Ships in 1-2 Business Days


Jeep Wrangler Thermostat Part Number: 83501426AD
Jeep Wrangler Thermostat
Choose OEM Thermostat that meet Jeep factory standards. Jeep designs and tests every component for precision and durability. Each Thermostat follows strict manufacturing steps to lock in quality and fit. If your Jeep Wrangler matters to you, OEM parts make the smart choice. You'll get the exact look, feel, and performance you expect. Shop genuine Wrangler parts at the highly competitive prices online. Enjoy a manufacturer's warranty, a hassle-free return policy, and rapid delivery. No more guesswork with off brands. Get genuine parts with exact fit and true factory performance. Shop with confidence today at JeepPartsDeal.com.
Jeep Wrangler is among the car models that contain the Thermostat; this is a part that takes charge of the engine temperature and controls the quantity of the coolant that is supplied to the unit for it to run at the right conditions. A malfunction in the AC unit specifically thermostat is very dangerous and has the potential of leading to severe engine damage and also poses danger to the driver and passengers. It is worth noting that Jeep Wrangler vehicles for quite some time have been using such types of appropriate volumes as mechanical ones such as bimetallic strips or wax pellets, and pneumatic ones that are characterized by air-filled control tubes. These thermostats operate on the principle of controlling the flow of heat transfer fluids or turning the heating/cooling appliances on or off to control temperature for enhanced performance and to avoid overheating.
Jeep Wrangler Thermostat Parts and Q&A
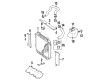
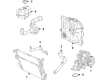
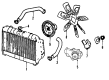
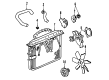
- Q: How to Maintain a Thermostat for Engine Coolant on Jeep Wrangler?A:First, wait for the system to cool, empty out the Radiator coolant until it is below the thermostat housing and watch out for hot coolant to avoid getting injured. If the coolant is clean, put it in a clean container after you use it. Always use tools designed for constant tension hose clamp servicing, either the special clamp tool number 6094 or Snap-On tool HPC-20, when working on the larger clamps and keep safety glasses on at all times. Loosen the upper radiator hose and replace the heater hose next to the thermostat housing and afterward remove the connector from the engine Coolant Temperature Sensor. Then, take out the thermostat housing mounting bolts, the housing, gasket and thermostat and throw away the old gasket to clean the mating surfaces. Remember to put the new thermostat so that the pellet is at the engine, it connects with the groove on the engine cylinder head and the arrow and air bleed hole point upward on its outer flange. Don't tighten any bolt more than 15 ft. lbs (20 Nm), since it might cause the housing to split open. Replace the hoses to the housing of the thermostat and to the coolant temperature sensor and make sure the radiator draincock is properly closed before adding coolant. Following the fill, start and warm the engine and make sure no leaks are visible. Wipe down the gasket sealing areas and put a new, damp, gasket over the connector of the water outlet, with the thermostat air bleed facing 12 o'clock inside the housing. Connect the coolant outlet connector and gasket to the thermostat, ensuring you've got it in the right place and then bolts them on, tightening the bolts to 28 Nm (20 ft. lbs.). After that, link the radiator hose to the coolant outlet housing and attach the engine coolant temperature sensor, then start filling the cooling system.
- Q: How to Install and Assemble a Thermostat on Jeep Wrangler?A:Attach thermostat housing 1 to the Intake Manifold, making sure that thermostat 2 is in the housing. Then insert and tighten the thermostat assembly with bolts 1 to 28 Nm (250 in. lbs.). From here, put the radiator upper hose on to thermostat housing 2 and plug in the throttle body electrical connector 3. Volume the cooling unit to its full extent and put the cable to the negative battery pole back in. After that, connect the air filter housing.
")

Related Jeep Wrangler Parts
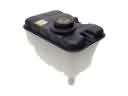 Jeep Wrangler Coolant Reservoir
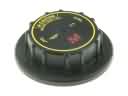 Jeep Wrangler Radiator Cap
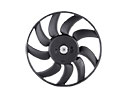 Jeep Wrangler Radiator fan
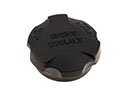 Jeep Wrangler Coolant Reservoir Cap
 Jeep Wrangler Fan Shroud
 Jeep Wrangler Radiator Support
 Jeep Wrangler Coolant Pipe
 Jeep Wrangler Coolant Reservoir Hose
 Jeep Wrangler Cooling Fan Assembly
 Jeep Wrangler Fan Blade
 Jeep Wrangler Oil Cooler Hose
 Jeep Wrangler Water Pump Gasket