JeepParts
My Garage
My Account
Cart
OEM 2005 Jeep Liberty Brake Booster
Brake Power Booster- Select Vehicle by Model
- Select Vehicle by VIN
Select Vehicle by Model
orMake
Model
Year
Select Vehicle by VIN
For the most accurate results, select vehicle by your VIN (Vehicle Identification Number).
1 Brake Booster found

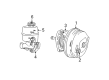
2005 Jeep Liberty Brake Booster Part Number: 5134120AA
Product Specifications- Other Name: Booster - Power Brake; Power Brake Booster; Power Booster; Booster Power Brake
- Item Weight: 7.90 Pounds
- Item Dimensions: 10.8 x 10.5 x 10.2 inches
- Condition: New
- Fitment Type: Direct Replacement
- SKU: 5134120AA
- Warranty: This genuine part is guaranteed by Mopar's factory warranty.
2005 Jeep Liberty Brake Booster Parts and Q&A
- Q: How to Service and Repair a Vacuum Brake Booster on a Right-Hand Drive on 2005 Jeep Liberty?A: For repair and service of the vacuum brake booster on a right-hand drive vehicle, first unbolt the air box and remount the cruise control servo closer to the booster. Break free the brake lines from the master cylinder and remove it. Cut the vacuum hose from the booster check valve and remove the knee blocker from its spot below the steering column along with the brake light switch. Remove the retaining clip from the booster push rod and take out the nuts that hold the booster to the dash panel. In the engine section, unhook the booster studs from the dashboard, flip the boost up and pull it away. Align the booster on the dash and fasten the nuts loosely so that the booster stays where you put it. Back up the booster push rod under the brake pedal and secure it with the retaining clip, but first grease the pedal pin with Mopar multi-mileage grease. Set the bolts in the booster to 39 Nm (29 ft. lbs.) and then attach the brake light switch and knee blocker. Should the original master cylinder be used again, look at the seal at the back and replace it if it needs it. Wipe the brake booster cylinder mounting area with a shop towel that has been sprayed with brake cleaner, since this will stop vacuum leaks. Place the master cylinder over the booster studs and hold it with mounting nuts, applying 17.5 Nm or 155 inch lbs. of pressure. Connect the hose between the vacuum pump and the booster check valve, mount the cruise control servo in its original place and fasten the nuts joined to the cruise control mount using 17.5 Nm (155 inch lbs. of torque). Let the brake lines together, making sure you turn them by hand to keep them from being crossed. Link the wire with the reservoir, place the air box back in, bleed and fill both reservoirs with fluid and check the brakes before restarting the engine.
Related 2005 Jeep Liberty Parts
 2005 Jeep Liberty Brake Caliper
 2005 Jeep Liberty Brake Line
 2005 Jeep Liberty Speed Sensor
 2005 Jeep Liberty Wheel Stud
 2005 Jeep Liberty ABS Control Module
 2005 Jeep Liberty Brake Caliper Bracket
 2005 Jeep Liberty Brake Disc
 2005 Jeep Liberty Brake Dust Shield
 2005 Jeep Liberty Brake Master Cylinder
 2005 Jeep Liberty Hydraulic Hose
 2005 Jeep Liberty Parking Brake Cable
 2005 Jeep Liberty Parking Brake Shoe