JeepParts
My Garage
My Account
Cart
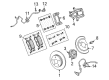
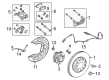
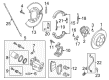
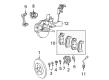
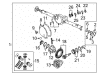
OEM Chrysler Wheel Stud
Rim Wheel Stud- Select Vehicle by Model
- Select Vehicle by VIN
Select Vehicle by Model
orMake
Model
Year
Select Vehicle by VIN
For the most accurate results, select vehicle by your VIN (Vehicle Identification Number).
15 Wheel Studs found


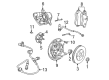
Chrysler Wheel Stud, Front Part Number: 6508707AA
$7.89 MSRP: $11.60You Save: $3.71 (32%)Ships in 1-3 Business DaysProduct Specifications- Other Name: Stud - Wheel; Wheel Lug Stud, Front; Wheel Bolt; Stud Wheel Part Not Released; Stud Wheel Not Released; Stud Wheel; Wheel Lug Stud
- Position: Front


Chrysler Wheel Stud, Front Part Number: 6512205AA
$9.99 MSRP: $14.85You Save: $4.86 (33%)Ships in 1-2 Business DaysProduct Specifications- Other Name: Bolt-6 Lobe External Head; Suspension Knuckle, Axle Hub, Steering Knuckle, Wheel Lug Stud, Front; Wheel Hub Repair Kit.; Spindle Bolt, Hub Assembly Bolt, Knuckle Bolt, Engine Cradle Front Bolt, M12X1.75X45.00
- Position: Front
- Replaces: 6511089AA, 6510218AA


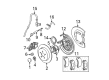
Chrysler Wheel Stud, Rear Part Number: 6507915AA
$21.11 MSRP: $31.00You Save: $9.89 (32%)Ships in 1-2 Business DaysProduct Specifications- Other Name: Stud - Hub; Wheel Lug Stud, Front, Rear; Wheel Hub Repair Kit; Wheel Bolt; Hub Assembly Stud; Stud Hub; Wheel Lug Stud
- Position: Rear


Chrysler Wheel Stud, Rear Part Number: 6502311
$11.14 MSRP: $16.10You Save: $4.96 (31%)Ships in 1-2 Business DaysProduct Specifications- Other Name: Stud - Hub; Wheel Lug Stud, Front, Rear; Wheel Hub Repair Kit; Wheel Hub Bolt; Wheel Bolt; Hub & Bearing Wheel Stud; Bolt Hexagon Head M12X1.50X46.88; For 15" Heavy Duty Brakes.
- Position: Rear


Chrysler Wheel Stud, Rear Part Number: 6036659AA
$11.29 MSRP: $16.75You Save: $5.46 (33%)Ships in 1-2 Business DaysProduct Specifications- Other Name: Stud - Hub; Wheel Lug Stud, Front, Rear; Wheel Hub Bolt; Wheel Bolt; Hub & Bearing Stud; Axle Shaft Stud; Stud; Stud Wheel .562-18X2.340; Stud Hub .562-18X2.340; Stud Wheel; Wheel Lug Stud
- Position: Rear
- Replaces: 6035323

Chrysler Wheel Stud, Rear Part Number: 6506532AA
$7.10 MSRP: $13.95You Save: $6.85 (50%)Ships in 1-2 Business DaysProduct Specifications- Other Name: Stud - Hub; Wheel Lug Stud, Front, Rear; Wheel Hub Repair Kit; Wheel Hub Bolt; Wheel Bolt; Rotor Stud; Hub & Bearing Stud; Hub Assembly Stud; Stud M12X1.5X41.5; Stud Hub; Wheel Lug Stud
- Position: Rear

Chrysler Wheel Stud, Front Part Number: MB911495
$1.43 MSRP: $2.10You Save: $0.67 (32%)Ships in 1-2 Business DaysProduct Specifications- Other Name: Bolt - Hub; Wheel Lug Stud, Front, Rear; Wheel Hub Repair Kit; Hub Assembly Stud; Stud; Stud Hub; Wheel Lug Stud
- Position: Front
- Replaces: 3880A001, MB891852

Chrysler Wheel Stud, Rear Part Number: 5204272AB
$14.93 MSRP: $22.15You Save: $7.22 (33%)Product Specifications- Other Name: Stud - Wheel; Wheel Lug Stud, Rear; Wheel Hub Bolt; Wheel Bolt; Stud; Stud Wheel; Wheel Lug Stud
- Position: Rear
- Replaces: 5204272

Chrysler Wheel Stud, Rear Part Number: 6503007
$14.57 MSRP: $18.75You Save: $4.18 (23%)Product Specifications- Other Name: Stud - Hub; Wheel Lug Stud, Front, Rear; Rotor Wheel Stud; Stud; Bolt, Front Wheel Stud; Bolt, Rear Wheel Stud; Stud Hub
- Position: Rear

Chrysler Wheel Stud, Front Part Number: 6501053
$14.57 MSRP: $18.75You Save: $4.18 (23%)Product Specifications- Other Name: Stud - Hub; Wheel Lug Stud, Front; Wheel Bearing and Hub Assembly; Wheel Bolt; Stud; Bolt, 14-15" Wheels; M12-1.50X41Mm; Front Wheel Driving; Wheel Lug Stud
- Position: Front

Chrysler Knuckle Bolt Part Number: MU140016
Product Specifications- Other Name: Stud - Wheel Hub; Suspension Knuckle Bolt; Bolt, Front Hub Mounting; Bolt Wheel Hub; Bolt Hub

Chrysler Wheel Stud, Rear Part Number: 6504891AA
Product Specifications- Other Name: Stud - Hub; Wheel Lug Stud, Rear; Wheel Hub Bolt; Wheel Bolt; Rotor Wheel Stud; Stud Hub; Wheel Lug Stud
- Position: Rear
Chrysler Wheel Stud, Rear Part Number: 4746174
Product Specifications- Other Name: Bolt - Wheel; Wheel Lug Stud, Rear; Wheel Bolt; Stud, Wheel Mounting; Plate, Torque; Stud Wheel; Wheel Lug Stud
- Position: Rear

Chrysler Wheel Stud, Rear Part Number: 6503835
Product Specifications- Other Name: Stud - Hub; Wheel Lug Stud, Rear; Wheel Bolt; Stud Wheel M12-1.50X45; Stud, Rear Wheel; Stud Hub; Wheel Lug Stud
- Position: Rear

Chrysler Wheel Stud, Front Part Number: 5114200AA
Product Specifications- Other Name: Stud - Hub; Wheel Lug Stud, Front; Wheel Bolt; Stud Hub 9/16-18; Stud Hub; Wheel Lug Stud
- Position: Front
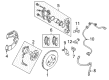
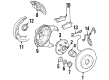
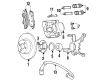
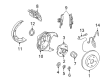
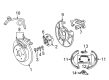
Chrysler Wheel Stud
OEM parts sourced directly from Chrysler deliver superior quality, long lasting strength, and a precise fit you can trust. Each item goes through strict quality checks to ensure safety, toughness, and performance that matches your factory equipment. At JeepPartsDeal online shop, you'll get top-quality, budget-friendly OEM Chrysler Wheel Stud for your vehicle. We focus on giving you a high standard without pushing up the price. Our full selection of genuine factory products comes backed by the original manufacturer's warranty. You'll love our fast delivery, seamless shopping experience, and convenient return policy, saving you all the hassle.
Chrysler Wheel Stud fits the wheel to the hub, ensuring that all the rides are calm. In 1925, Chrysler earned its reputation based on its strong cars and continues to reward drivers with no nonsense ownership, clear pricing, and honest value. Floating Power mounts by Chrysler have tamed vicious engine vibrations to keep cabins smooth, hands loose, and the mirrors no longer buzz like they did when the road retaliated. Chrysler took the aggressive Airflow design to the extreme where it cut wind, conserved fuel, subdued noises, and swamped the cabin with smoother air. Chrysler introduced the first real-life minivan, demonstrating that spacious interiors, flat floor, sliding doors, and easy parking can be combined to live every day. However, over time its line grew increasingly successful in terms of the quality of ride and everyday usefulness without losing any of its straight-shooting sense. The shank and hub bite is made of high-strength steel and press-fit, creating a semi-permanent anchor in Wheel Stud, which enables the tire to be changed without loosening threads despite years in potholes and hard braking. Frequent visual inspection ensures every Wheel Stud is straight, not rusty, and properly torqued, since one strained stud may have a domino effect into wobble, heat, and finally loss of wheel. Once damage sets in, changing a Wheel Stud takes a few minutes and the full clamp force is regained to allow the suspension components to cooperate and the driver maintain control at any speed.
Chrysler Wheel Stud Parts and Q&A
- Q: How to Replace Wheel Studs on the Rear Wheels on Chrysler Pacifica?A:Before you replace the rear wheel studs, lift the car, remove the rear wheel and then take out the brake rotor. Stop tightening your shoe until the adjuster threads are at the bottom, then remove the spring under the adjuster with the needed tools. Grab the top of the shoe that faces the driver's side and pull it up to leave some slack so you can get to the adjuster. Install the Remover, Special Tool C-4150A, onto the hub, bearing flange and wheel stud and while it is in place, tighten the forcing screw to push the wheel stud off before removing the tool. You may need to rock the stud back and forth to allow it to be removed from the rear of the hub flange. Place the new wheel stud into the flange of the hub and bearing from behind, cover the stud with a stack of about five washers and fit a regular wheel mounting nut so the flat side faces the washers. Screw the nut tight enough on the wheel stud so the head of the nut is pressed against the rear side of the hub flange. Then remove the nut and the washers. After placing the parking brake shoe adjuster between the two shoes, use the end with the star wheel to push the adjusting boss up and move the upper shoe down to tighten it around the slot on the adjuster. Use the best tools to attach the spring to the adjuster. Slide the Brake Shoe Gauge, Special Tool C-3919, over the widest point of the parking brake shoes and record the measurement over the rotor surface. Turn the adjuster star wheel on both parking brake shoes until the linings on both shoes come into contact with the gauge jaws. Fasten the brake rotor onto the hub and restore any removed parts. After that, place the wheel and tire assembly in place, ensuring the wheel lug nuts are tightened in the correct order to 135 Nm (100 ft. lbs.). Modify the parking brake shoes, take the car down to the ground and test drive it to see if the brakes are in good shape.
- Q: How to Service Rear Wheel Studs on Chrysler 300?A:You should place the vehicle on a jack and support it with jack stands and then pull off the rear wheel to adjust the fasteners. Connect the rear brakes and back off the adjuster until all the threads on the shoe have been removed. Use suitable instruments to take the spring off the adjuster, then pull up on the upper shoe near the adjuster to allow you to remove the adjuster. Attach the Remover C-4150A to the hub's inner flange and to the wheel stud and turn the forcing screw to pop the stud out of the flange and hub, then take the tool off. To make it easier to remove the studs, rock the hub flange back and forth. When installing, start by sliding the new wheel stud into the rear of the flange, then pile five washers over the stud and tighten a standard wheel mounting nut with its flat side against the washers. Trade Workshop at Hand drawings Put the parking brake shoe adjuster between the upper and lower parking brake shoes, so the end with the star wheel is facing upward and use the upper shoe to press against the adjuster's mounting slot. Install the spring securely at the adjuster with the suitable devices. Check the center diameter of the shoe by measuring the brake drum and then read the measurement inside the parking brake drum area with Brake Shoe Gauge C-3919 or an equivalent gauge. Lay the gauge over the parking brake shoe at its widest area and use the adjuster star wheel to tighten the shoes so the linings contact the gauge jaws. Put the brake rotor back on, reinstalling all of the removed components and fit the wheel and tire assembly, tightening the mounting nuts to 150 Nm (110 ft. lbs.) torque in the right order. Change the parking brake shoes, bring the vehicle to riding height and test the brakes on the road to check if they're okay.


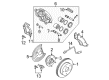
Related Chrysler Parts
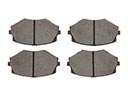 Chrysler Brake Pads
 Chrysler ABS Control Module
 Chrysler Brake Booster
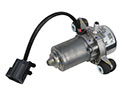 Chrysler Brake Booster Vacuum Pump
 Chrysler Brake Caliper Bolt
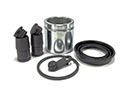 Chrysler Brake Caliper Repair Kit
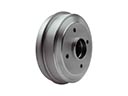 Chrysler Brake Drum
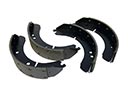 Chrysler Brake Shoe Set
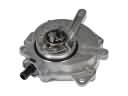 Chrysler Vacuum Pump
 Chrysler Wheel Cylinder
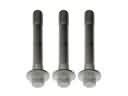 Chrysler Wheel Hub Bolt
 Chrysler Wheel Seal