JeepParts
My Garage
My Account
Cart
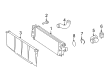
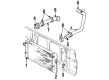
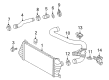
OEM Dodge Intercooler
Front Intercooler- Select Vehicle by Model
- Select Vehicle by VIN
Select Vehicle by Model
orMake
Model
Year
Select Vehicle by VIN
For the most accurate results, select vehicle by your VIN (Vehicle Identification Number).
11 Intercoolers found


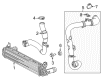
Dodge Intercooler Part Number: 55111495AC
$186.14 MSRP: $383.00You Save: $196.86 (52%)Product Specifications- Other Name: Cooler - Charge Air; Cooler Charge Air
- Replaces: 55111495AB


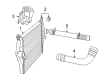
Dodge Intercooler Part Number: 68190237AB
$435.37 MSRP: $657.00You Save: $221.63 (34%)Ships in 1-2 Business DaysProduct Specifications- Other Name: Cooler - Charge Air; Cooler Charge Air
- Replaces: 68190237AA


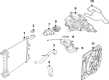
Dodge Intercooler Part Number: 68004294AB
$259.57 MSRP: $1045.00You Save: $785.43 (76%)Ships in 1-2 Business DaysProduct Specifications- Other Name: Cooler - Charge Air
- Replaces: 68004294AA


Dodge Intercooler Part Number: 5278944AD
$383.90 MSRP: $734.00You Save: $350.10 (48%)Ships in 1-2 Business DaysProduct Specifications- Other Name: Cooler - Charge Air
- Replaces: 5278944AC

Dodge Intercooler Part Number: 55056902AE
$773.50 MSRP: $1175.00You Save: $401.50 (35%)Ships in 1-2 Business DaysProduct Specifications- Other Name: Cooler - Charge Air; Turbocharger Intercooler; Charge Air Cooler; Turbo Intercooler; Cooler Charge Air
- Replaces: 55056902AD, 55057116AE, 68069554AA, 55057118AD, 55057116AD, 55057116AF

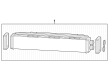
Dodge Auxiliary Cooler Part Number: 68365280AB
$288.41 MSRP: $436.00You Save: $147.59 (34%)Product Specifications- Other Name: Cooler - Auxiliary Low Temperature; Radiator; Cooler Auxiliary Low Temperature
- Replaces: 68365280AA


Dodge Intercooler Part Number: 68013636AA
Product Specifications- Other Name: Intercooler - Charge Air; Turbocharger Intercooler; Charge Air Cooler; Turbo Intercooler; Cooler Charge Air


Dodge Intercooler Part Number: 5170704AJ
Product Specifications- Other Name: Coolant Package - Charge Air; Turbocharger Intercooler; Charge Air Cooler; Turbo Intercooler; Cooler Package Charge Air
- Replaces: 5170704AF, 5170704AD, 55056817AB, 5170704AE, 55056593AA, 52028881AC, 5170704AB, 5170704AH, 55056817AA, 5170704AI, 5170704AC, 5170704AG

Dodge Intercooler Part Number: 52028724AG
Product Specifications- Other Name: Cooler - Charge Air

Dodge Cooler Part Number: 5119997AA
Product Specifications- Other Name: Cooler - Charge Air; Intercooler; Turbocharger Intercooler; Turbo Intercooler; Cooler Charge Air
Dodge Cooler Part Number: 5104119AA
Product Specifications- Other Name: Cooler - Charge Air; Intercooler; Turbocharger Intercooler; Turbo Intercooler; Cooler Charge Air
Dodge Intercooler
OEM parts sourced directly from Dodge deliver superior quality, long lasting strength, and a precise fit you can trust. Each item goes through strict quality checks to ensure safety, toughness, and performance that matches your factory equipment. At JeepPartsDeal online shop, you'll get top-quality, budget-friendly OEM Dodge Intercooler for your vehicle. We focus on giving you a high standard without pushing up the price. Our full selection of genuine factory products comes backed by the original manufacturer's warranty. You'll love our fast delivery, seamless shopping experience, and convenient return policy, saving you all the hassle.
Dodge Intercooler maintains the intake air cool and dense, unlocking harder pulls and extending engine life. Dodge has been stamping steel, power, and attitude in every body that has come off the line since 1914. Dodge has gone far beyond HEMI thunder, Viper swagger, and now a Fratzonic Chambered Exhaust you can roar or whisper with, as you feel like, Drag, Donut, Sport, or stealth. Drives such as the straight talk, Dodge produces cars that can be punished and more throttle requested. Anything muscle encounters tech upgrades that are not showroom tinkles, and thus teens and veterans both are grinning. Sound, shove, and steel are in line with zero apology, heritage is aligned with new voltage throughout the lineup. Within that higher heart rate, an Intercooler cools the compressed air and then cylinders suck in that cooler air as pacier oxygen packages that supply explosions rather than the heat drench. The Intercooler supports turbo or supercharger designs, either air-to-air fin work or an air-to-liquid core. Since the cooler charge contributes to the torque, the Intercooler allows throttle to be kept down longer before detonation knock lowers confidence. Track day/city slog, the Intercooler assures reliability and a final Dodge badge makes us all wise to the power.
Dodge Intercooler Parts and Q&A
- Q: How to Install the Intercooler on Dodge Sprinter 3500?A:Begin by connecting the charge air cooler to the radiator and following this, join the power steering cooler loop to the charge air cooler. Following this, link together the charge air hose and then fit both radiator trims in place. Following that, place the front grille and cross member, then mount the headlamp assemblies and then place the front bumper.
- Q: How to Service and Repair an Intercooler System on Dodge Ram 2500?A:For service and repairs on the charge air cooler system, first take away the battery's negative connection and purge the A/C system. Take out the auxiliary cooler of the transmission and the tubing from the charge air cooler, then unscrew the bolts and shift the charge air cooler out and upward to remove it. Avoid using harsh cleaners for your system and if dirt in the inside cannot be cleaned off, you will need to get a new charge air cooler. When turbo-charger damage or oil stain happens, place the charge air cooler with the air tubes straight up and down, pour solvent into its tubes against the usual air current using a stream siphon, give it a light shake and strike both ends with a rubber mallet to drive out debris. Keep running water in the valve until the contaminants are all out, then wash it with hot soapy water, rinse with clean water and finish by blowing out with compressed air. Check for any cracked or broken parts, along with holes and damage in the tubes, fins or welds of the charge air cooler. If anything is found, then replace the entire cooler. Check the charge air cooler with Charge Air Cooler Tester Kit No. 382456 purchased from Cummins Service Products as explained by the directions. When installing, slide the charge air cooler into place, secure it with bolts turned to 2 Nm (17 inch lbs.) torque and connect the intake tubes to the charge air cooler, with clamps tightened to 11 Nm (95 inch lbs.) torque. Install both transmission auxiliary cooler and A/C condenser if included, connect the battery's negative cables, then check for boost system leaks by running the engine.


Related Dodge Parts
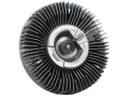 Dodge Fan Clutch
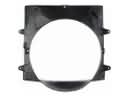 Dodge Fan Shroud
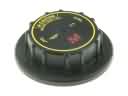 Dodge Radiator Cap
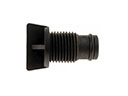 Dodge Radiator Drain Plug
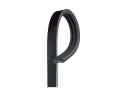 Dodge Serpentine Belt
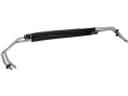 Dodge Automatic Transmission Oil Cooler Line
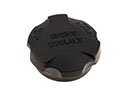 Dodge Coolant Reservoir Cap
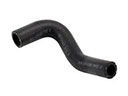 Dodge Cooling Hose
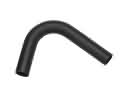 Dodge Radiator Hose
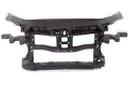 Dodge Radiator Support
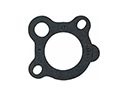 Dodge Thermostat Gasket
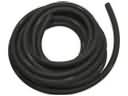 Dodge Transmission Oil Cooler Hose