JeepParts
My Garage
My Account
Cart
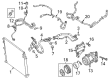
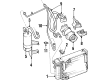
OEM Jeep A/C Hose
Air Conditioning Hose- Select Vehicle by Model
- Select Vehicle by VIN
Select Vehicle by Model
orMake
Model
Year
Select Vehicle by VIN
For the most accurate results, select vehicle by your VIN (Vehicle Identification Number).
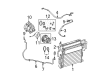
208 A/C Hoses found


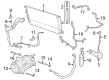
Jeep Discharge Hose Part Number: 68260607AA
$48.76 MSRP: $107.00You Save: $58.24 (55%)Ships in 1-2 Business DaysProduct Specifications- Other Name: Line - A/C Discharge; A/C Refrigerant Discharge Hose; A/C Refrigerant Liquid Hose; A/C Hose; Discharge Line; Line A/C Discharge


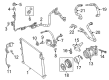
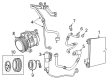
Jeep Suction Line Part Number: 68194991AD
$72.42 MSRP: $111.00You Save: $38.58 (35%)Ships in 1-2 Business DaysProduct Specifications- Other Name: Line - A/C Condenser; A/C Refrigerant Liquid Hose; A/C Hose; Line A/C Condenser Jumper
- Replaces: 68194991AB, 68194991AC


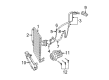
Jeep A/C Hoses Part Number: 55056589AB
$99.01 MSRP: $151.00You Save: $51.99 (35%)Product Specifications- Other Name: Line - A/C Discharge; A/C Refrigerant Discharge Hose; A/C Refrigerant Liquid Hose; A/C Hose; Discharge Line; Line A/C Discharge


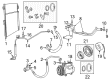
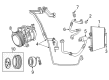
Jeep Suction Hose Part Number: 68312609AD
$102.41 MSRP: $156.00You Save: $53.59 (35%)Product Specifications- Other Name: Line - A/C Suction; A/C Refrigerant Suction Hose; A/C Refrigerant Liquid Hose; A/C Hose; Line A/C Suction Includes: Seals
- Replaces: 68312609AC, 68312609AB


Jeep Liquid Line Part Number: 55037860AE
$162.84 MSRP: $247.00You Save: $84.16 (35%)Ships in 1-2 Business DaysProduct Specifications- Other Name: Line - Auxiliary A/C Liquid; A/C Refrigerant Liquid Hose; A/C Hose
- Replaces: 55037860AC, 55037860AD


Jeep A/C Hoses Part Number: 55111375AH
$235.37 MSRP: $359.00You Save: $123.63 (35%)Product Specifications- Other Name: Line - A/C Suction And Liquid; A/C Refrigerant Suction Hose; A/C Refrigerant Liquid Hose; A/C Hose; Suction Line; Line A/C Suction And Liquid
- Replaces: 55111375AG, 55111375AE, 55111375AC, 55111375AB, 55111375AF, 55111375AD


Jeep Liquid Line Part Number: 5058899AF
$254.15 MSRP: $388.00You Save: $133.85 (35%)Ships in 1-2 Business DaysProduct Specifications- Other Name: Line - A/C Suction And Liquid; A/C Refrigerant Liquid Hose; A/C Hose; Line A/C Suction And Liquid
- Replaces: 5058899AB, 5058899AD, 5058899AE


Jeep Suction Hose Part Number: 5058897AB
$73.59 MSRP: $110.00You Save: $36.41 (34%)Product Specifications- Other Name: Line - A/C Suction; A/C Refrigerant Suction Hose; A/C Refrigerant Liquid Hose; A/C Hose; Suction Line; Line A/C Suction
- Replaces: 5058897AA


Jeep Liquid Line Part Number: 55116909AE
$93.81 MSRP: $141.00You Save: $47.19 (34%)Product Specifications- Other Name: Line - A/C Liquid; A/C Refrigerant Liquid Hose; A/C Hose
- Replaces: 55116909AD


Jeep Discharge Hose Part Number: 55038056AC
$111.22 MSRP: $168.00You Save: $56.78 (34%)Product Specifications- Other Name: Line - A/C Discharge; A/C Refrigerant Discharge Hose; A/C Refrigerant Liquid Hose; A/C Hose; Discharge Line; Line A/C Discharge Includes: Seals, Transducer, O - Ring, Valve Core


Jeep Discharge Line Part Number: 68103259AE
$114.85 MSRP: $172.00You Save: $57.15 (34%)Ships in 1-3 Business DaysProduct Specifications- Other Name: Line - A/C Suction & Discharge; A/C Refrigerant Discharge Hose; A/C Refrigerant Liquid Hose; A/C Hose; Suction & Discharge Hose Assembly; Line A/C Suction & Discharge
- Replaces: 68103259AC, 68103259AB, 68103259AD, 68103259AA


Jeep Discharge Line Part Number: 55116710AE
$117.92 MSRP: $177.00You Save: $59.08 (34%)Ships in 1-2 Business DaysProduct Specifications- Other Name: Line - A/C Discharge; A/C Refrigerant Discharge Hose; A/C Refrigerant Liquid Hose; A/C Hose
- Replaces: 55116710AB, 55116710AC, 55116710AD


Jeep A/C Hoses Part Number: 55037599AE
$129.34 MSRP: $195.00You Save: $65.66 (34%)Ships in 1-2 Business DaysProduct Specifications- Other Name: Line - A/C Discharge; A/C Refrigerant Discharge Hose; A/C Refrigerant Liquid Hose; A/C Hose; Discharge Line; Line A/C Discharge Contains Items 2 To 7; Line A/C Discharge


Jeep A/C Hoses Part Number: 55056587AC
$197.36 MSRP: $295.00You Save: $97.64 (34%)Product Specifications- Other Name: Line - A/C Suction And Liquid; A/C Refrigerant Suction Hose; A/C Refrigerant Liquid Hose; A/C Hose; Suction Line; Line A/C Suction And Liquid
- Replaces: 55056587AB


Jeep Suction Line Part Number: 68288395AB
$261.89 MSRP: $395.00You Save: $133.11 (34%)Ships in 1-2 Business DaysProduct Specifications- Other Name: Line - A/C Suction & Discharge; A/C Refrigerant Discharge Hose; A/C Refrigerant Liquid Hose; A/C Hose; Suction & Discharge Hose Assembly; Line A/C Suction & Discharge
- Replaces: 68288395AA

Jeep Suction Line Part Number: 68103268AG
$271.83 MSRP: $410.00You Save: $138.17 (34%)Product Specifications- Other Name: Line - A/C Suction & Discharge; A/C Refrigerant Suction Hose; A/C Refrigerant Liquid Hose; A/C Hose; Suction & Discharge Hose Assembly; Line A/C Suction & Discharge
- Replaces: 68103268AE, 68103268AB, 68103268AC, 68103268AF, 68103268AD


Jeep Liquid Line Part Number: 5058152AH
$213.03 MSRP: $303.00You Save: $89.97 (30%)Ships in 1-2 Business DaysProduct Specifications- Other Name: Line - A/C Suction And Liquid; A/C Refrigerant Liquid Hose; A/C Hose; Line A/C Suction And Liquid

Jeep Discharge Hose Part Number: 55038018AC
$127.18 MSRP: $177.00You Save: $49.82 (29%)Ships in 1-2 Business DaysProduct Specifications- Other Name: Line - A/C Discharge; A/C Refrigerant Discharge Hose; A/C Refrigerant Liquid Hose; A/C Hose; Discharge Line; Line A/C Discharge Includes: Seals, Transducer, O - Ring, Valve Core


Jeep A/C Hose Part Number: 55036632AC
$88.84 MSRP: $112.62You Save: $23.78 (22%)Ships in 1-2 Business DaysProduct Specifications- Other Name: Line - A/C Liquid; A/C Refrigerant Liquid Hose; A/C Hoses; Line A/C Liquid


Jeep Discharge Line Part Number: 68194990AH
$133.69 MSRP: $197.00You Save: $63.31 (33%)Product Specifications- Other Name: Line - A/C Condenser; A/C Refrigerant Discharge Hose; A/C Refrigerant Liquid Hose; A/C Hose; Line A/C Condenser Jumper
- Replaces: 68194990AG, 68194990AD, 68194990AB, 68194990AF, 68194990AE, 68194990AC
| Page 1 of 11 |Next >
1-20 of 208 Results
Jeep A/C Hose
OEM parts sourced directly from Jeep deliver superior quality, long lasting strength, and a precise fit you can trust. Each item goes through strict quality checks to ensure safety, toughness, and performance that matches your factory equipment. At JeepPartsDeal online shop, you'll get top-quality, budget-friendly OEM Jeep A/C Hose for your vehicle. We focus on giving you a high standard without pushing up the price. Our full selection of genuine factory products comes backed by the original manufacturer's warranty. You'll love our fast delivery, seamless shopping experience, and convenient return policy, saving you all the hassle.
Jeep A/C Hose maintains the coldness of cabin air by transferring pressure-proof refrigerant. Jeep developed its legend based on wartime toughness and eventually transformed it into the freedom of everyday life. Since the first civilian Willys up to the present SUVs, Jeep remains close to open skies and unpaved lanes. Chooseable traction settings allow drivers to switch between snow and sand mode without theatrics, demonstrating how Jeep balances the ease of simple controls with primitive grip. Dash screens are voice responsive and update themselves during the night, and yet there is still room to have the characteristic exposed fenders and removable doors. The proprietors exchange tales of trails around the globe, creating a sense of community that values self-reliance and not showroom brightness. What has been created is an SUV range that is sincere, easy to make changes to, and will never be out of a weekend adventure. The A/C Hose enables the refrigerant delivery of high pressure to the evaporator on any Jeep model without hassle when temperatures increase. The rubber walls are made of synthetic rubber and the crimped aluminum ends are tight against vibration; therefore, the A/C Hose shoves rock, mud, and even stop-and-go heat. Once installed, the A/C Hose maintains the coolant cycles at a constant, protecting the engines and comfort of the cabin over the years. Although new hybrids include additional under-hood equipment, the A/C Hose slots remain the same, which demonstrates its universal fit and future-proof construction.
Jeep A/C Hose Parts and Q&A
- Q: How to Replace an A/C Hose on Jeep Wrangler?A:The first step to changing the A/C discharge hose/line is to unhook the negative battery cable, disconnect the refrigerant charging lines and let the refrigerant out of the system. For 4.0L model vehicles, take out the bolt holding the refrigerant line support bracket to the engine and remove the discharge line from the bracket. After that, take out the bolt holding the discharge line fitting to the compressor, unhook the fitting from the compressor discharge port and throw away the seal. Seal the opening to the condenser-side fitting and use tape to cover the compressor discharge port, then unscrew the nut on the discharge line fitting to disconnect it from inside the condenser and remove it from the car. Take out the O-ring seal from the discharge line fitting and seal up or tape the opened fitting and the condenser inlet port. First, put the discharge line in the engine section. Then, remove the covering or plugs from the condenser inlet socket and fitting for the discharge line and apply a drop of clean refrigerant oil to a new O-ring. Fit the O-ring and then plug it into the discharge line fitting, next matching it to the condenser inlet port. Install the fitting nut, fasten it so it reaches 12 Nm (105 in. lbs.), then peel off the tape or plugs covering the ports or fittings, apply new O-ring seal and install the seal on the discharge line fitting. Tighten the fitting bolt to 25.4 Nm (20 ft. lbs.) and mount the discharge line into the refrigerant bracket, securing it by tightening the bracket bolt to 28 Nm (21 ft. lbs.). Once everything is done, remove the vehicle, drain the refrigerant and put everything back in after recharging the system.
- Q: How to Properly Service and Repair an A/C Hose for 3.7L/4.7L Engines for Discharge Hose on Jeep Grand Cherokee?A:Recharging the refrigerant in an A/C system should be followed by adjusting the oil level, to make sure the A/C keeps working properly and the compressor is not damaged. For situations where you replace many A/C components at once, turn to the Refrigerant Oil Capacities chart to work out the needed oil. When a refrigerant line is opened, don't forget to replace its O-rings and gaskets so there will be no leaks. First, mount the discharge line under the vehicle inside the engine compartment and then eliminate any coverings or plugs from the drains in the discharge line and compressor or condenser. Apply clean refrigerant oil to the new dual-plane seals and attach only the specially made R-134a seals to the A/C discharge line. Put the A/C discharge line onto the compressor, tighten it with nut 1 and use a torque wrench to get a tightness of 20 Nm (15 ft. lbs.). Then, join the A/C discharge line to the A/C condenser and use nut 5 to lock it in place while tightening it to 20 Nm (15 ft. lbs.). Reattach the air cleaner housing, the air intake tube and resonator, then place the grille. Attach the negative battery cable again, remove all the refrigerant, adjust the oil level and add back the refrigerant.


Related Jeep Parts
 Jeep Cabin Air Filter
 Jeep Blend Door Actuator
 Jeep Heater Core
 Jeep Blower Motor
 Jeep A/C Compressor Clutch
 Jeep Blower Motor Resistor
 Jeep Evaporator
 Jeep A/C Accumulator
 Jeep A/C Compressor
 Jeep A/C Service Cap
 Jeep Air Temperature Sensor
 Jeep HVAC Pressure Switch