JeepParts
My Garage
My Account
Cart
OEM Jeep Liberty Piston
Engine Pistons- Select Vehicle by Model
- Select Vehicle by VIN
Select Vehicle by Model
orMake
Model
Year
Select Vehicle by VIN
For the most accurate results, select vehicle by your VIN (Vehicle Identification Number).
4 Pistons found


Jeep Liberty Vibration Damper Part Number: 5142303AB
$56.55 MSRP: $81.25You Save: $24.70 (31%)Ships in 1-3 Business Days
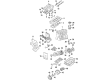
Jeep Liberty Piston Part Number: 5142544AB
$82.96 MSRP: $381.00You Save: $298.04 (79%)Ships in 1-2 Business Days

Jeep Liberty Piston Part Number: 5019316AC

Jeep Liberty Piston Part Number: 5142785AB
Jeep Liberty Piston
Choose OEM Piston that meet Jeep factory standards. Jeep designs and tests every component for precision and durability. Each Piston follows strict manufacturing steps to lock in quality and fit. If your Jeep Liberty matters to you, OEM parts make the smart choice. You'll get the exact look, feel, and performance you expect. Shop genuine Liberty parts at the highly competitive prices online. Enjoy a manufacturer's warranty, a hassle-free return policy, and rapid delivery. No more guesswork with off brands. Get genuine parts with exact fit and true factory performance. Shop with confidence today at JeepPartsDeal.com.
Piston is found in Jeep Liberty vehicles where it has an important function of translating combustion power into the energy required to power the vehicle. This subcomponent is necessary for the internals combustion engine to convert force created by expanding gases to crankshaft elasticity. Jeep Liberty pistons are made from aluminum alloys mostly, and for light weight, and high strength, some of the high performance pistons are made out of forged or billet alloys. In Jeep Liberty cars the application of various types of pistons is observed over the years, for example trunk piston embracing side forces and equipped with rings for oil circulation. Moreover, racing pistons are known to be used in high RPM applications and that entails placing emphasis on the weight of the pistons. These features include the presence of cooling cavities as well as the type of material used in Jeep liberty pistons are very crucial to the engine and overall functionality of Jeep liberty hence makes them to be a design variation.
Jeep Liberty Piston Parts and Q&A
- Q: How to Install and Replace a Piston and Connecting Rod on Jeep Liberty?A:Do not connect the piston and connecting rod assemblies into the bore until you have inserted the piston rings. Put the piston head and rings in engine oil, then apply a ring compressor over them to keep the rings in their right place. Set the bearing on the connecting rod so its shell tabs fit into the connecting rod's slots and the bearing's middle line is parallel to the middle line of the connecting rod. Wipe clean engine oil onto the bearing surface. Thread Special Tool 8507 Connecting Rod Guides into the connecting rod holes. A raised "F" mark on the piston pin bore of each piston shows the installation position which should face the front of the engine on both sides, with the connecting rod oil slinger sitting on the back edge of the piston pin bearing cap. Clean off the cylinder bore and put a bit of engine oil on it. Crankshaft rotation needs to be done until the connecting rod journal is correctly located in relation to the cylinder bore, then insert the rod and piston in the cylinder bore, ensuring that the connecting rod guides are over the crankshaft journal. Guide the connecting rod into place in the journal using a piston while you tap down the piston into the bore using a hammer handle. Torque to Yield Connecting Rod Bolts should only be used once and you should always change them when they are removed or just seem loose. Rub engine oil on the rod bolts and bearing areas, put the cap and bearing in place and tighten the bolts to 27 Nm (20 ft. lbs.) plus 90 degrees. Fit the cylinder head(s), Timing Chain and cover, covers for the cylinder heads and Oil Pan with gasket/windage tray. Use the correct engine oil to top off the crankcase and then join the negative cable to the battery.
- Q: How to Prepare for Piston and Connecting Rod Removal from an Engine on Jeep Liberty?A:First, the cylinder head needs to come off, before you can take out the pistons and connecting rods. First, use a trustworthy ridge reamer to knock down the cylinder ridge and remember to cover the piston head when you work on each cylinder's locating pin. After that, separate the Oil Pan and mark each connecting rod and cap with scribes so you know which cylinder is which. The pistons are shaped so that the front stamping is closest to the front of the engine. Lift and remove the pistons and connecting rods from the tip of the cylinder block, making certain that each rod is perfectly centered in the bore by rotating the Crankshaft. Take out the Balance Shaft Assembly after that and unscrew the connecting rod cap bolts, pulling each piston and rod out of the bore gently so as not to scrape the crankshaft journals. With the grips removed, add the bearing cap to the connecting rod, because these parts are serviced together. When installing, make sure the gaps in the compression ring are spaced out unevenly and the oil ring expander ends meet the gaps in the rail that match the fit. After lubricating the piston with clean oil, set the ring compressor on top to maintain the rings where they are. The directional stamp in the piston should be located at the front of the engine. Rotate the crankshaft so that the journal is right in the center of the cylinder bore, then slide in the assembly with rod and piston and guide the rod over the journal. Using a hammer handle, push the piston into the cylinder bore and use your other hand to guide the connecting rod onto the journal. You should never reuse the bolts for the cap; before installing the new bolts, give their threads a coat of clean oil and tighten them each by hand. Do not torque them together using a torque wrench. Last, fasten the bolts to 54 Nm (40 ft. lbs.) and tighten them another 1/4 turn, then see what side clearance you have using a feeler gauge.


Related Jeep Liberty Parts
 Jeep Liberty Harmonic Balancer
 Jeep Liberty Oil Pan
 Jeep Liberty Transmission Mount
 Jeep Liberty Rod Bearing
 Jeep Liberty Crankshaft Timing Gear
 Jeep Liberty Cylinder Head Gasket
 Jeep Liberty Motor And Transmission Mount
 Jeep Liberty Timing Chain Guide
 Jeep Liberty Timing Cover
 Jeep Liberty Timing Cover Gasket
 Jeep Liberty Valve Stem Seal
 Jeep Liberty Variable Timing Sprocket