JeepParts
My Garage
My Account
Cart
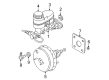
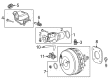
OEM Chrysler PT Cruiser Brake Master Cylinder
- Select Vehicle by Model
- Select Vehicle by VIN
Select Vehicle by Model
orMake
Model
Year
Select Vehicle by VIN
For the most accurate results, select vehicle by your VIN (Vehicle Identification Number).
4 Brake Master Cylinders found

Chrysler PT Cruiser Master Cylinder Part Number: 5015160AA
$304.08 MSRP: $385.48You Save: $81.40 (22%)Ships in 1-2 Business Days

Chrysler PT Cruiser Master Cylinder Part Number: 5142503AB
Chrysler PT Cruiser Master Cylinder Part Number: 5017973AA
Chrysler PT Cruiser Master Cylinder Part Number: 5142507AB
Chrysler PT Cruiser Brake Master Cylinder
Choose OEM Brake Master Cylinder that meet Chrysler factory standards. Chrysler designs and tests every component for precision and durability. Each Brake Master Cylinder follows strict manufacturing steps to lock in quality and fit. If your Chrysler PT Cruiser matters to you, OEM parts make the smart choice. You'll get the exact look, feel, and performance you expect. Shop genuine PT Cruiser parts at the highly competitive prices online. Enjoy a manufacturer's warranty, a hassle-free return policy, and rapid delivery. No more guesswork with off brands. Get genuine parts with exact fit and true factory performance. Shop with confidence today at JeepPartsDeal.com.
The subject of our research is the Brake Master Cylinder in Chrysler PT Cruiser vehicles, which plays a vital role in Brake System converting the pressure of the foot of a driver into hydraulic force. This hydraulic force is communicated to the slave cylinders which in turn activates the brakes, to create a friction that helps to halt the vehicle. Generally, the master cylinder comprises pistons, seals, and springs made of cast iron or aluminum or maybe combined with aluminum; reservoirs may be integrated or separate. Chrysler PT Cruisers are equipped with dual circuit master cylinders whereby in cases where one circuit is unable to deliver sufficient braking the other can. This design shows a safety aspect because the machine may still be run even when there is a hydraulic system breakdown. Known problems with brake master cylinder include leakages and internal deterioration of the brake master cylinder which in turn reduces the effectiveness of brakes. Periodic checks for signs of leakage, dampness in respect of the braking system is very important.
Chrysler PT Cruiser Brake Master Cylinder Parts and Q&A
- Q: How to Service and Repair a Brake Master Cylinder on a Left-Hand Drive with ABS on Chrysler PT Cruiser?A:If your car has a left-hand drive and ABS or not, start by pumping the brake pedal 4-5 times with the engine turned off until the pedal offers a firm press. Take the air cleaner cover and its housing off, unhook the negative Battery Cable and disconnect the power distribution center at the side. On cars without ABS, take the brake tubes off the master cylinder and the proportioning valves and place plugs in all the open tubing. Wipe the surroundings of the master cylinder attachment to the power Brake Booster using a suitable brake cleaner. Unscrew the two nuts at the top of the master cylinder and slide the master cylinder away from the booster. When you have to, unhook the proportioning valves from the master cylinder. Prior to installation, push the brake pedal to disinfect the master cylinder and wipe the booster contact spot. Set the master cylinder on the studs and line the push rod up; push the master cylinder into place until it touches the booster face. After the master cylinder is held in place with tightened nut, attach both ends of the brake tubes to the ports, tightening to 17 Nm (145 in. lbs.). Put on the brake switch wiring, put the power distribution center in its place, attach the negative battery cable again and reinstall the air cleaner housing and its primary cover. Fill the reservoir in the master cylinder until the brake pedal becomes firm and then drive the car. If you don't manage to fix a firm pedal, drain the Brake Lines and check them for damage, then go for a test drive to check the brakes.
- Q: How to Remove and Replace a Brake Master Cylinder Without ABS on a Left-Hand Drive on Chrysler PT Cruiser?A:With ABS removed from your left-hand drive car, first place the proportioning valves (1, 3) inside the master cylinder and tighten their O-rings to a torque of 27 Nm (20 ft. lbs.). Bleeding the master cylinder is necessary before you install it. Remove the master cylinder from the system and bleed it until the fluid comes out clear. While doing so, wipe from the Brake Booster any cleaner or dirt that could damage its face. Replace or install a new seal on the mounting flange of the master cylinder; if one is already in place, remove it first and attach the new one, so it fits properly without being crooked. If resistance is felt during insertion, put the master cylinder push rod parallel to the booster push rod. Bring the master cylinder mounting holes in line with the power brake booster's mounting studs, then place the master cylinder on the boost. Assemble the master cylinder mounting nuts (3) into the cylinder and tighten by turning them to 25 Nm (221 in. lbs.). If the transaxle uses a manual system and a replacement reservoir is needed, cut the clutch actuator port (3) at the center of the "V" groove (1) and throw out the plug (2) you removed. On the clutch actuator hose (1), slide onto the reservoir port and then fit the hose clamp (2) near the upset bead (3). Link tubes 1, 3, 4 and 5 to ports 2 by the master cylinder and the proportioning valve, making sure the nuts are tightened to 17 Nm (145 in. lbs.). At the switch, insert the wiring connector (2) for the brake fluid level switch, fasten the power distribution center, link the negative Battery Cable and put the air cleaner housing and cover on with the two clips. Top up the master cylinder correctly and test the brake pedal; if it is loose, drain the brake fluid and look for any leaks. Test the vehicle in traffic to check that the brakes are working properly.


Related Chrysler PT Cruiser Parts
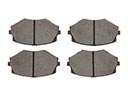 Chrysler PT Cruiser Brake Pads
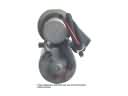 Chrysler PT Cruiser ABS Pump And Motor Assembly
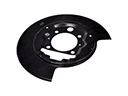 Chrysler PT Cruiser Backing Plate
 Chrysler PT Cruiser Brake Booster
 Chrysler PT Cruiser Brake Caliper Bolt
 Chrysler PT Cruiser Brake Caliper Bracket
 Chrysler PT Cruiser Brake Caliper Piston
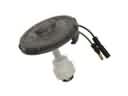 Chrysler PT Cruiser Brake Fluid Level Sensor
 Chrysler PT Cruiser Brake Proportioning Valve
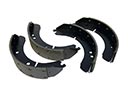 Chrysler PT Cruiser Brake Shoe Set
 Chrysler PT Cruiser Parking Brake Cable
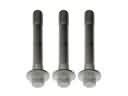 Chrysler PT Cruiser Wheel Hub Bolt