JeepParts
My Garage
My Account
Cart
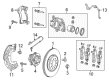
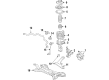
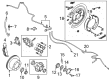
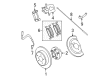
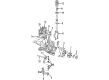
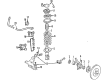
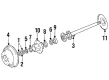
OEM Dodge Wheel Bearing
Hub Bearing- Select Vehicle by Model
- Select Vehicle by VIN
Select Vehicle by Model
orMake
Model
Year
Select Vehicle by VIN
For the most accurate results, select vehicle by your VIN (Vehicle Identification Number).
103 Wheel Bearings found


Dodge Hub Assembly, Front Part Number: 52104699AJ
$220.27 MSRP: $563.00You Save: $342.73 (61%)Ships in 1-2 Business DaysProduct Specifications- Other Name: Hub - Brake; Wheel Bearing and Hub Assembly, Front; Wheel Bearing and Hub Assembly; Wheel Hub Repair Kit; Wheel Hub; Hub
- Position: Front
- Replaced by: 52104699AK


Dodge Hub Assembly, Front Part Number: 4670292AC
$108.82 MSRP: $200.00You Save: $91.18 (46%)Ships in 1-2 Business DaysProduct Specifications- Other Name: Hub - Wheel; Wheel Hub, Front; Wheel Hub Repair Kit; Front Hub; Hub Wheel; Wheel Hub
- Position: Front


Dodge Hub & Bearing, Front Part Number: 68030387AB
$339.18 MSRP: $538.00You Save: $198.82 (37%)Ships in 1-2 Business DaysProduct Specifications- Other Name: Hub - Brake; Front Wheel Bearing and Hub Assembly; Wheel Hub Repair Kit; Wheel Bearing Kit.; Front Hub & Bearing
- Position: Front
- Replaces: 52070323AB, 68030387AA


Dodge Wheel Bearing, Rear Part Number: 52124768AB
$174.22 MSRP: $267.00You Save: $92.78 (35%)Ships in 1-2 Business DaysProduct Specifications- Other Name: Bearing - Wheel; Wheel Bearing, Rear; Axle Bearing; Rear Wheel Bearing; Bearing; Bearing Wheel
- Position: Rear


Dodge Wheel Bearing, Front Part Number: 5105586AB
$176.17 MSRP: $267.00You Save: $90.83 (35%)Ships in 1-2 Business DaysProduct Specifications- Other Name: Bearing - Wheel; Wheel Bearing, Front; Axle Bearing; Wheel Bearings; Bearing; Bearings; Bearing Wheel
- Position: Front
- Replaces: 5105586AA, 5105587AA


Dodge Hub & Bearing, Rear Driver Side Part Number: 68184743AC
$216.31 MSRP: $328.00You Save: $111.69 (35%)Ships in 1-2 Business DaysProduct Specifications- Other Name: Hub & Bearing - Wheel; Wheel Bearing and Hub Assembly, Rear Left; Wheel Hub Repair Kit; Wheel Hub; Hub Assembly; Hub And Bearing Wheel; Wheel Bearing and Hub Assembly; Wheel Bearing
- Position: Rear Driver Side
- Replaces: 4779797AB, 4779797AA, 68184743AA, 68184743AB


Dodge Hub & Bearing, Rear Part Number: 4779328AB
$268.52 MSRP: $410.00You Save: $141.48 (35%)Ships in 1-2 Business DaysProduct Specifications- Other Name: Bearing - Brake; Wheel Bearing and Hub Assembly; Wheel Hub Repair Kit; Axle Bearing.; Hub Assembly; Front Hub & Bearing; Wheel Bearing and Hub Assembly.
- Position: Rear
- Replaces: 4779328AA, 4779218AB


Dodge Hub & Bearing, Front Part Number: 68302651AA
$371.28 MSRP: $565.00You Save: $193.72 (35%)Product Specifications- Other Name: Bearing - Brake; Front Wheel Bearing and Hub Assembly; Wheel Hub Repair Kit; Axle Bearing.; Hub Assembly; Front Hub & Bearing; Hub And Bearing Brake; Wheel Bearing and Hub Assembly; Wheel Bearing
- Position: Front
- Replaces: 5154262AA, 5154262AB


Dodge Wheel Bearing, Rear Part Number: 3507898AB
$58.43 MSRP: $87.55You Save: $29.12 (34%)Ships in 1-2 Business DaysProduct Specifications- Other Name: Bearing - Axle Shaft; Drive Axle Shaft Bearing, Rear; Differential Bearing; Axle Bearing; Axle Bearings; Bearing Assembly; Differential Cover Bearing; Bearing; Bearing Axle Shaft; Bearing Wheel
- Position: Rear

Dodge Hub Assembly, Front Part Number: 4670292AF
$94.61 MSRP: $143.00You Save: $48.39 (34%)Ships in 1-2 Business DaysProduct Specifications- Other Name: Hub - Wheel; Wheel Hub, Front; Wheel Hub Repair Kit; Front Hub; Hub Wheel; Wheel Hub
- Position: Front
- Replaces: 4670292AE


Dodge Hub Assembly, Front Part Number: 68346842AA
$160.56 MSRP: $240.00You Save: $79.44 (34%)Ships in 1-2 Business DaysProduct Specifications- Other Name: Hub - Wheel; Front Wheel Bearing and Hub Assembly; Wheel Hub Repair Kit; Axle Bearing.; Front Hub & Bearing
- Position: Front
- Replaces: 68137552AB, 68137552AC, 68137552AA


Dodge Hub & Bearing, Front Part Number: 4779199AA
$182.86 MSRP: $274.00You Save: $91.14 (34%)Ships in 1-2 Business DaysProduct Specifications- Other Name: Bearing - Brake; Front Wheel Bearing and Hub Assembly; Wheel Hub Repair Kit; Axle Bearing.; Hub Assembly; Front Hub & Bearing; Hub And Bearing Brake; Wheel Bearing and Hub Assembly; Wheel Bearing
- Position: Front


Dodge Hub Assembly, Front Part Number: 5154211AA
$217.43 MSRP: $325.00You Save: $107.57 (34%)Ships in 1-2 Business DaysProduct Specifications- Other Name: Hub & Bearing - Wheel; Front Wheel Bearing and Hub Assembly; Repair Kit; Bearing Kit; Axle Bearing.; Front Hub & Bearing; Hub And Bearing Wheel; Wheel Bearing and Hub Assembly; Wheel Bearing
- Position: Front
- Replaces: 5085406AB, 5085406AC, 5105233AB, 5105233AC


Dodge Wheel Bearing, Rear Outer Part Number: 5086774AA
$34.65 MSRP: $51.35You Save: $16.70 (33%)Ships in 1-2 Business DaysProduct Specifications- Other Name: Bearing - Wheel; Wheel Bearing, Rear Inner, Rear Outer; Axle Bearing; Bearings; Wheel Bearings; Inner Bearing; Bearing Wheel Inner; Bearing Wheel
- Position: Rear Outer
- Replaced by: 68645813AA


Dodge Wheel Bearing, Rear Outer Part Number: 5086982AA
$89.51 MSRP: $132.00You Save: $42.49 (33%)Ships in 1-3 Business DaysProduct Specifications- Other Name: Cup - Wheel; Wheel Bearing, Rear Inner, Rear Outer; Axle Bearing; Bearings; Wheel Bearings; Inner Bearing; Bearing Wheel
- Position: Rear Outer


Dodge Wheel Bearing, Rear Inner Part Number: 5086772AA
$98.74 MSRP: $146.00You Save: $47.26 (33%)Ships in 1-3 Business DaysProduct Specifications- Other Name: Bearing - Wheel; Wheel Bearing, Rear Inner, Rear Outer; Axle Bearing; Bearings; Wheel Bearings; Outer Bearing; Bearing Wheel Outer; Bearing Wheel
- Position: Rear Inner


Dodge Hub & Bearing, Rear Part Number: 68184746AE
$54.87 MSRP: $78.85You Save: $23.98 (31%)Product Specifications- Other Name: Bearing - Brake; Rear Wheel Bearing and Hub Assembly; Hub Repair Kit.; Hub & Bearing Assembly; Rear Hub & Bearing; Wheel Bearing and Hub Assembly
- Position: Rear
- Replaces: 68184746AC, 68184746AD, 68184746AA, 5154198AB, 5154198AD, 5154198AC, 68184746AB


Dodge Hub & Bearing, Front Part Number: 4578144AB
$248.54 MSRP: $318.00You Save: $69.46 (22%)Ships in 1-2 Business DaysProduct Specifications- Other Name: Bearing - Brake; Front Wheel Bearing and Hub Assembly; Wheel Hub Repair Kit; Axle Bearing.; Hub Assembly; Front Hub & Bearing; Front Hub; Hub And Bearing Brake; Wheel Bearing and Hub Assembly; Wheel Bearing
- Position: Front
- Replaces: 4593462AA, 4578144AA


Dodge Hub & Bearing Part Number: MR223993
Product Specifications- Other Name: Hub - Front Wheel; Wheel Bearing and Hub Assembly; Repair Kit; Axle Bearing.; Front Wheel Bearing; Front Hub & Bearing; Hub, Front Wheel


Dodge Drum Hub Part Number: 52009839AA
Product Specifications- Other Name: Hub - Wheel; Wheel Hub Repair Kit; Wheel Hub; Hub; Hub Wheel
| Page 1 of 6 |Next >
1-20 of 103 Results
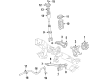
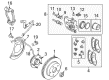
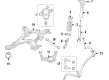
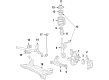
Dodge Wheel Bearing
OEM parts sourced directly from Dodge deliver superior quality, long lasting strength, and a precise fit you can trust. Each item goes through strict quality checks to ensure safety, toughness, and performance that matches your factory equipment. At JeepPartsDeal online shop, you'll get top-quality, budget-friendly OEM Dodge Wheel Bearing for your vehicle. We focus on giving you a high standard without pushing up the price. Our full selection of genuine factory products comes backed by the original manufacturer's warranty. You'll love our fast delivery, seamless shopping experience, and convenient return policy, saving you all the hassle.
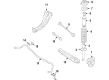
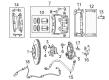
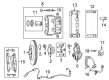
Dodge Wheel Bearing ensures that wheels turn straight, reduce friction, and prevent harmful play. Dodge began as a grim machine shop and bled to be the badge of brute strength, ruggedness, and hard-hitting performance that would not yield to the softer wood frames. In 1914, Dodge proudly stamped the first mass-produced all-steel body and dares its customers to leave their wood frames behind and rely on cold steel to withstand a lynching. Dodge has since produced HEMI thumpers, Viper thrills, and currently a 600-watt Fratzonic roar that allows electric cars to shout at drag strip or sneak through dawn neighborhoods. Dodge duets the noise wizardry and chooseable Drag, Donut, Sport, and Stealth options and makes every commute a menu of moods instead of a boring necessity. Wheel Bearing is located in the hub and the wheel is moving rather than metal to metal on hardened races and rollers. This is a small component that supports weight, fills out bumps, and releases heat due to continuous rotation. The wheel is also clamped by Wheel Bearing to its axle but free spins, and therefore accuracy of the micrometer is important since even small pits create howl, shimmy, and inaccurate steering at high speeds. Wheel Bearing now delivers sealed and sells life grease which literally keeps off grit and negates messy maintenance. When a Wheel Bearing is worn out, a growing growl notifies the drivers that they must take action before wobble becomes hazardous. Change the component in a short time and the vehicle drives straight, tires wear evenly, and the car consumes less fuel.
Dodge Wheel Bearing Parts and Q&A
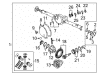
- Q: How to remove and install front Wheel Bearing on 4WD Dodge Ramcharger?A:Before disassembling the bearing(s), purchase or rent the tool required to remove the locknut and adjusting nut from the spindle, and obtain the parts necessary to replace the inner bearing seal, as it should always be replaced when the hub assembly is dismantled. If the special tool is unavailable, the procedure should be handled by a dealership or shop specializing in this work. Early model 44FBJ axles require two pullers for this procedure; if these cannot be obtained, a dealership or repair shop must handle it. Begin by raising the vehicle and securely placing it on jackstands, loosening the axleshaft nut before raising the vehicle for early models. Remove the locking hub assemblies if equipped, followed by the brake caliper assembly. Use a socket and extension to remove the six flange bolts through the flange holes, rotating the hub for access. Remove the outer axle nut and use a puller to detach the hub assembly, then mount it in a vise with soft jaws. Carefully remove the inner cup, bearing, spacer, outer cup, and retainer plate from the hub using a special tool and adapters. For axles not equipped with integrated bearing/hub assemblies, pry out the inner bearing assembly and seal after removing the retainer bolts and retainer from the steering knuckle; for those with integrated assemblies, only the inner seal needs to be pried out. To remove the outer bearing cone, reposition the puller assembly and add the proper adapters, then remove the retainer seal from the hub, ensuring to keep the respective cup and cone bearing sets together. For early model 60 axles and all locking hub models, remove the hub cap and snap-ring on full-time 4-wheel-drive models, then remove the flange bolts and lock washers. Straighten the retaining washer tabs on full-time models, and remove the wheel bearing locknut retainer washer and adjusting nut using a special tool. Pull the hub and disc assembly off the spindle, allowing the outer wheel-bearing cone and roller assembly to slide out. Pry the inner wheel bearing grease seal from the hub and remove the inner bearing cone and bearing cups using a puller and slide hammer. Inspect the bearing cups for pits and cracks, replacing them if necessary, and drive in new cups with care. Clean all old grease from the bearings using solvent and blow them dry with compressed air without spinning them. Inspect the bearing components and replace them if excessive wear is noted, then lubricate the bearings and bearing cups with multi-purpose lubricant. Clean all old grease from the hub. For installation on early model 44FBJ axles, carefully install the new retainer seal using a suitably sized piece of pipe or wood block, then install the retainer flange and outer bearing cone on the hub. Press the bearing onto the hub and follow with the outer bearing cup, spacer, inner bearing cup, and inner bearing cone. Remove the tool and take the hub assembly from the vise, then install a new O-ring on the steering knuckle and slide the hub assembly onto the axleshaft. Align the hub retainer with the steering knuckle flange, install the flange bolts, and tighten them in a criss-cross pattern to the specified torque. Install the axleshaft nut and tighten it to 100 ft-lb, continuing until the cotter key can be inserted. Install the brake caliper and lower the vehicle. For early model 60 axles and all locking hub models, position the inner bearing cone and roller in the inner cup and install the grease seal, then carefully position the hub and disc assembly on the spindle. Install the outer bearing cone and roller along with the adjusting nut, adjust the wheel bearing, and for vehicles with model 60 axles, install the drive flange with a new hub gasket, followed by the lock washers and flange bolts, tightening them to the specified torque. For full-time 4-wheel-drive models, install the hub cap and snap-ring, then install the brake caliper and lower the vehicle.

Related Dodge Parts
 Dodge Lug Nuts
 Dodge Wheel Cover
 Dodge Axle Pivot Bushing
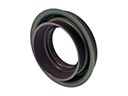 Dodge Axle Shaft Seal
 Dodge Bump Stop
 Dodge Coil Spring Insulator
 Dodge Control Arm Shaft Kit
 Dodge Leaf Spring Plate
 Dodge Spare Wheel
 Dodge Strut Mounts
 Dodge Sway Bar Bracket
 Dodge Sway Bar Link Bushing
Browse Dodge Wheel Bearing by Models
Charger Challenger Ram 1500 Dakota Durango Viper Dart Grand Caravan Ram 2500 Journey Caravan Avenger D100 D150 Magnum Neon Nitro Raider Stealth Caliber Ramcharger Omni Dynasty Ram 3500 Shadow Spirit Stratus Ram 50 W250 600 Aries B250 B350 Charger Daytona Colt D250 D350 Daytona Diplomat Hornet Power Ram 50 Ram 1500 Van Rampage Sprinter 2500 Sprinter 3500 W100 W150 W350 B2500 Lancer B150 B1500 B3500 Mini Ram Ram 2500 Van Ram 3500 Van